Python教程
1 Python基本语法
R语言 - 包更多,功能拓展更丰富编程更复杂,容易出错
Python - 简洁、遍历、不易错性,是火爆市场的不二法门
学习Python编程的利器:https://www.python.org/doc/
iPython:https://www.ipython.org/
jupyter notebook:http://jupyter-notebook.readthedocs.io/cn/latest/
Pycharm:https://www.jetbrains.com/pycharm/
Pip:https://pip.pypa.io/en/stable/installing/
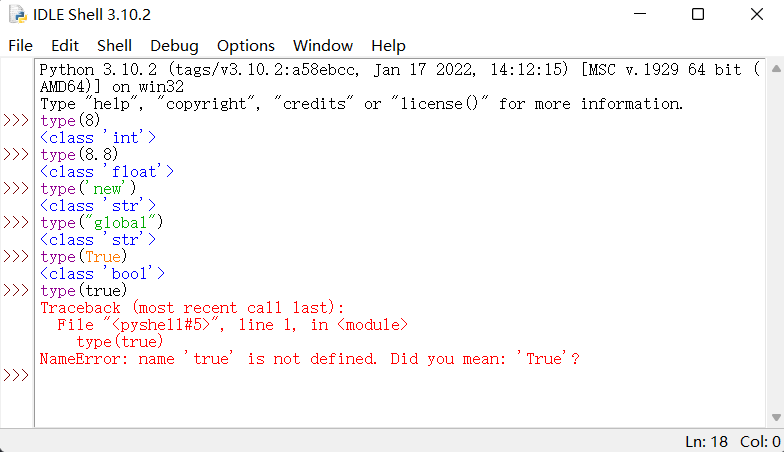
基本数据类型:
整数(int)
浮点数(float)
字符串(str)
布尔值(bool)
具体效果如图:
注意:true和false不是bool类型,True和False为bool类型
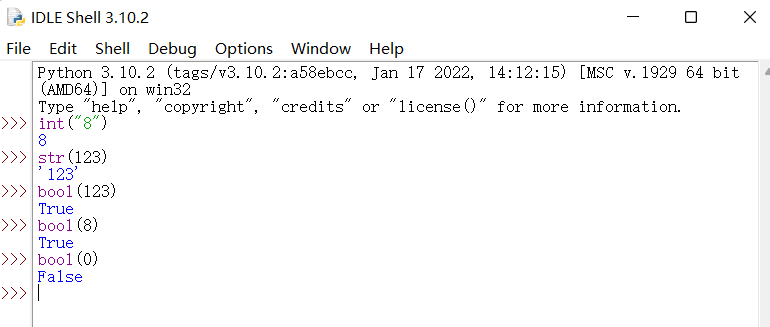
可以通过以下命令将字符进行转换
输出结果为数字类型的8。
同理,如图:
示例:
1 2 3 4 bandwidth = 100 ratio = 8 print (bandwidth / ratio)
==注意==:Python对于单引号和双引号没有区分,如果想用引号的嵌套,需要用双引号。
对于不懂的函数可以通过help(语法)来进行学习。
为了写出的代码非常美观,应当尽量满足PEP8规范:https://peps.python.org/pep-0008/
2 序列
2.1 序列的概念
序列 :指的是它的成员都是有序排列并且可以i通过下表偏移量访问到它的一个或几个成员
字符串 、列表 、元组 三种类型都属于序列
字符串:“abcd”
列表:[0,"abcd"]
元组:("abc","def")
2.2 字符串的定义和使用
示例1:
1 2 3 4 5 chinese_zodiac = '鼠牛虎兔龙蛇马羊猴鸡狗猪' print (chinese_zodiac[0 :4 ]) print (chinese_zodiac[-1 ]) print (chinese_zodiac[-3 ])
示例2:
1 2 3 4 5 chinese_zodiac = '猴鸡狗猪鼠牛虎兔龙蛇马羊' year = 2022 print (year % 12 ) print (chinese_zodiac[year % 12 ])
字符串的常用操作 :
成员关系操作符 in not in 示例:对象 [not] in 序列
连接操作符 + 示例:序列 + 序列
重复操作符 * 示例:序列 * 序列
切片操作符 [:] 示例:序列[0:整数]
示例:
1 2 3 4 5 6 7 8 9 10 11 12 chinese_zodiac = '猴鸡狗猪鼠牛虎兔龙蛇马羊' print ('狗' not in chinese_zodiac) print (chinese_zodiac + chinese_zodiac) print (chinese_zodiac + 'abcd' ) print (chinese_zodiac * 3 ) print (chinese_zodiac[0 :2 ])
==注意==:列表和元组的区别,列表中的数据可以变更,元组中的数据不能变更。
2.2 元组的定义和常用操作
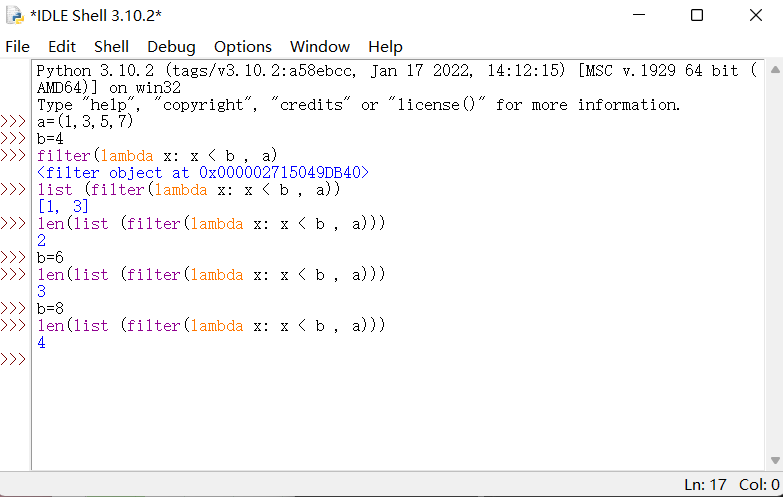
示例:在Python的shell中输入以下代码:
1
2
3
4
5
6
7
8
9
a=(1,3,5,7) b=4 filter(lambda x: x < b , a) #输出为 <filter object at 0x000002715049DB40> list (filter(lambda x: x < b , a)) #输出为 [1, 3] len(list (filter(lambda x: x < b , a))) #输出为 2 b=6 len(list (filter(lambda x: x < b , a))) #输出为 3 b=8 len(list (filter(lambda x: x < b , a))) #输出为 4
效果如图:
示例:
1
2
3
4
5
6
7
8
zodiac_name = ('魔羯座' , '水瓶座' , '双鱼座' , '白羊座' , '金牛座' , '双子座' , '巨蟹座' , '狮子座' , '处女座' , '天秤座' , '天蝎座' , '射手座' ) zodiac_days = ((1 , 20 ), (2 , 19 ), (3 , 21 ), (4 , 21 ), (5 , 21 ), (6 , 22 ), (7 , 23 ), (8 , 23 ), (9 , 23 ), (10 , 23 ), (11 , 23 ), (12 , 23 )) (month, day) = (2 , 15 ) zodiac_day = filter (lambda x: x <= (month, day), zodiac_days) print (zodiac_day) print (list (zodiac_day))
2.3 列表的定义和常用操作
示例:
1 2 3 4 5 a_list=['abc' ,'xyz' ] a_list.append('X' ) print (a_list) a_list.remove('xyz' ) print (a_list)
3 条件与循环
3.1 条件语句
条件语句:if
使用方法:
或
1 2 3 4 5 6 if 表达式: 代码块 elif 表达式: 代码块 else: 代码块
示例1:
1 2 3 x = 'abc' if x == 'abc' : print ('x的值和abc相等' )
示例2:
1 2 3 4 5 x = 'abcd' if x == 'abc' : print ('x的值和abc相等' ) else : print ('x的值和abc不相等' )
示例3:
1 2 3 4 5 6 7 x = 5 if x < 5 : print ('x<5>' ) elif x == 5 : print ('x=5' ) else : print ('x>5' )
示例4:
1 2 3 4 chinese_zodiac = '猴鸡狗猪鼠牛虎兔龙蛇马羊' year = int (input ('请用户输入出生年份' )) if chinese_zodiac[year % 12 ] == '狗' : print ('狗年运势' )
3.2 循环语句
3.2.1 for语句
for语句使用方法:
示例:
1 2 3 4 5 6 7 8 9 chinese_zodiac = '猴鸡狗猪鼠牛虎兔龙蛇马羊' for cz in chinese_zodiac: print (cz) for i in range (13 ): print (i) for j in range (1 , 13 ): print (j) for year in range (2000 , 2019 ): print ('%s 年的生肖是 %s' % (year, chinese_zodiac[year % 12 ]))
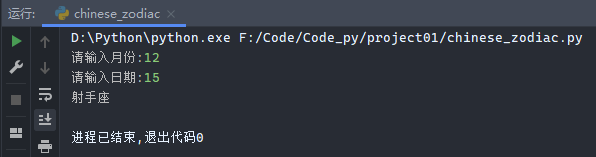
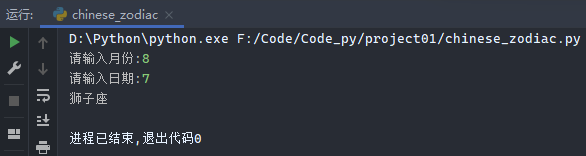
示例2:
1 2 3 4 5 6 7 8 9 10 11 12 zodiac_name = ('魔羯座' , '水瓶座' , '双鱼座' , '白羊座' , '金牛座' , '双子座' , '巨蟹座' , '狮子座' , '处女座' , '天秤座' , '天蝎座' , '射手座' ) zodiac_days = ((1 , 20 ), (2 , 19 ), (3 , 21 ), (4 , 21 ), (5 , 21 ), (6 , 22 ), (7 , 23 ), (8 , 23 ), (9 , 23 ), (10 , 23 ), (11 , 23 ), (12 , 23 )) int_month = int (input ('请输入月份:' )) int_day = int (input ('请输入日期:' )) for zd_num in range (len (zodiac_days)): if zodiac_days[zd_num] >= (int_month, int_day): print (zodiac_name[zd_num]) break elif int_day == 12 and int_day > 23 : print (zodiac_name[0 ]) break
输出结果:
3.2.2 while语句
while语句使用方法:
示例:
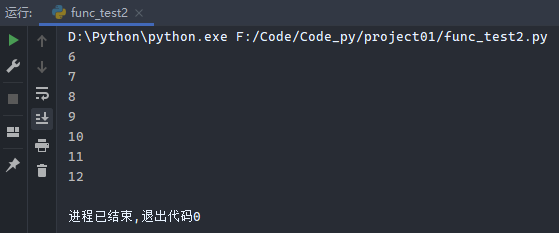
1 2 3 4 5 6 7 8 9 number = 8 while True : print (number) number = number + 1 if number == 12 : break if number > 10 : print ('a' ) continue
运行结果为: 8 9 10 a 11
示例2:
1 2 3 4 5 6 7 8 9 10 11 zodiac_name = ('魔羯座' , '水瓶座' , '双鱼座' , '白羊座' , '金牛座' , '双子座' , '巨蟹座' , '狮子座' , '处女座' , '天秤座' , '天蝎座' , '射手座' ) zodiac_days = ((1 , 20 ), (2 , 19 ), (3 , 21 ), (4 , 21 ), (5 , 21 ), (6 , 22 ), (7 , 23 ), (8 , 23 ), (9 , 23 ), (10 , 23 ), (11 , 23 ), (12 , 23 )) int_month = int (input ('请输入月份:' )) int_day = int (input ('请输入日期:' )) n = 0 while zodiac_days[n] < (int_month, int_day): if int_month == 12 and int_day > 23 : break n += 1 print (zodiac_name[n])
运行结果:
4 映射与字典
4.1 字典的定义和常用操作
映射的类型:字典
字典包含哈希值和指向的对象。
使用方法:{"哈希值":"对象"} 例如:{'length':180, 'width':80}
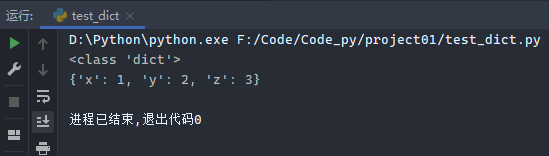
示例:
1 2 3 4 5 dict1 = {} print (type (dict1))dict2 = {'x' : 1 , 'y' : 2 } dict2['z' ] = 3 print (dict2)
运行结果:
示例2:
1 2 3 4 5 6 7 8 9 10 11 12 13 14 15 16 17 18 19 20 21 22 23 24 25 26 27 28 29 30 31 32 33 34 35 36 37 chinese_zodiac = '鼠牛虎兔龙蛇马羊猴鸡狗猪' zodiac_name = ('魔羯座' , '水瓶座' , '双鱼座' , '白羊座' , '金牛座' , '双子座' , '巨蟹座' , '狮子座' , '处女座' , '天秤座' , '天蝎座' , '射手座' ) zodiac_days = ((1 , 20 ), (2 , 19 ), (3 , 21 ), (4 , 21 ), (5 , 21 ), (6 , 22 ), (7 , 23 ), (8 , 23 ), (9 , 23 ), (10 , 23 ), (11 , 23 ), (12 , 23 )) cz_num = {} for i in chinese_zodiac: cz_num[i] = 0 z_num = {} for i in zodiac_name: z_num[i] = 0 while True : year = int (input ('请输入年份:' )) month = int (input ('请输入月份:' )) day = int (input ('请输入日期:' )) n = 0 while zodiac_days[n] < (month, day): if month == 12 and day > 23 : break n += 1 print (zodiac_name[n]) print ('%s 年的生肖是 %s' % (year, chinese_zodiac[(year + 8 ) % 12 ])) cz_num[chinese_zodiac[(year + 8 ) % 12 ]] += 1 z_num[zodiac_name[(year + 8 ) % 12 ]] += 1 for each_key in cz_num.keys(): print ('生肖 %s 有 %d 个' % (each_key, cz_num[each_key])) for each_key in z_num.keys(): print ('星座 %s 有 %d 个' % (each_key, z_num[each_key]))
4.2 列表推导式与字典推导式
示例:
1 2 3 4 5 6 7 8 9 10 11 12 13 14 15 16 17 18 19 20 21 22 alist = [] for i in range (1 , 11 ): if ((i % 2 ) == 0 ): alist.append(i*i) print (alist)blist = [i*i for i in range (1 , 11 ) if (i % 2 ) == 0 ] print (blist)zodiac_name = ('魔羯座' , '水瓶座' , '双鱼座' , '白羊座' , '金牛座' , '双子座' , '巨蟹座' , '狮子座' , '处女座' , '天秤座' , '天蝎座' , '射手座' ) z_num = {} for i in zodiac_name: z_num[i] = 0 print (z_num)z_num = {i: 0 for i in zodiac_name} print (z_num)
5 文件和输入输出
使用Python对文件进行基本的读写操作:
打开文件 open()
输入 read()
输入一行 readline()
文件内移动 seek()
输出 write()
关闭文件 close()
示例:
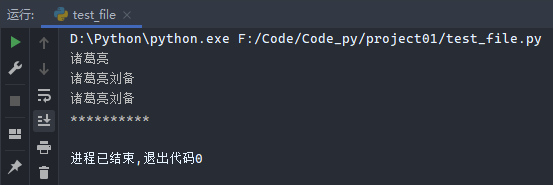
1 2 3 4 5 6 7 8 9 10 11 12 13 14 15 16 17 18 19 20 file1 = open ('name.txt' , 'w' ) file1.write('诸葛亮' ) file1.close() file2 = open ('name.txt' ) print (file2.read())file2.close() file3 = open ('name.txt' , 'a' ) file3.write('刘备' ) file3.close() file4 = open ('name.txt' ) print (file4.readline())file5 = open ('name.txt' ) for line in file5.readlines(): print (line) print ('**********' )
运行输出:
同时会产生一个name.txt文件,文件内容为:
示例2:读取多行
1 2 3 4 5 6 7 8 file4 = open ('name.txt' ) print (file4.readline()) file4.close() file5 = open ('name.txt' ) for line in file5.readlines(): print (line) file5.close()
运行结果:
示例3:
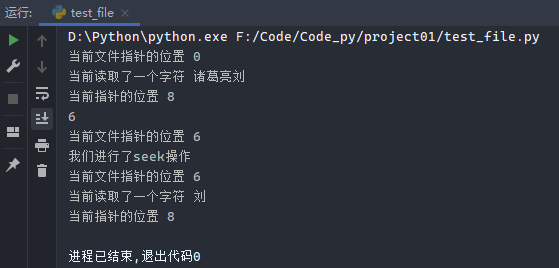
1 2 3 4 5 6 7 8 9 10 11 12 13 file6 = open ('name.txt' ) print ('当前文件指针的位置 %s ' % file6.tell()) print ('当前读取了一个字符 %s ' % file6.read(4 )) print ('当前指针的位置 %s ' % file6.tell()) print (file6.seek(6 , 0 ))print ('当前文件指针的位置 %s ' % file6.tell()) print ('我们进行了seek操作' ) print ('当前文件指针的位置 %s ' % file6.tell()) print ('当前读取了一个字符 %s ' % file6.read(1 )) print ('当前指针的位置 %s ' % file6.tell()) file6.close()
运行结果:
6 错误和异常
==错误 ≠ 异常==
异常是在出现错误时采用正常控制流以外的动作
异常处理的一般流程是:检测到错误,引发异常;对异常进行捕获的操作
使用方法:
1 2 3 4 5 6 try: <监控异常> except Exception[, reason]: <异常处理代码> finally: <无论异常是否发生都执行>
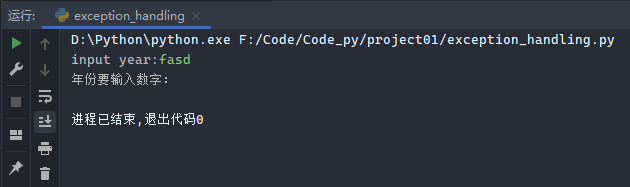
示例1:
1 2 3 4 try : year = int (input ('input year:' )) except ValueError: print ('年份要输入数字:' )
运行结果:
可以通过组成元组来进行多个错误捕获:except (ValueError, AttributeError, KeyError, ZeroDivisionError)
示例2:
1 2 3 4 try : print (1 / 0 ) except (ValueError, AttributeError, KeyError, ZeroDivisionError) as e: print ('这里对异常捕获 %s' % e)
这里将错误提示信息重新命名为变量,并进行打印,常用于调试时的错误信息提示。
运行结果:
示例3:
1 2 3 4 try : print (1 / 'a' ) except Exception as a: print ('%s' % a)
运行结果:
示例4:可以通过raise来自定义错误类型
1 2 3 4 try : raise NameError('helloError' ) except NameError: print ('my custom error' )
示例5:
1 2 3 4 5 6 try : aaa = open ('name1.txt' ) except Exception as e: print (e) finally : aaa.close()
7 函数
7.1 函数的定义和常用操作
函数 :函数是对程序逻辑进行结构化的一种编程方法。
函数的定义:
1 2 3 def 函数名称(): 代码 return 需要返回的内容
函数的调用:
示例1:
原始未利用自定义函数的代码:
1 2 3 4 5 6 7 8 9 10 11 12 13 14 15 16 f = open ('name.txt' ) data = f.read() print (data.split('|' ))f2 = open ('weapon.txt' , encoding='utf-8' ) i = 1 for line in f2.readlines(): if i % 2 == 1 : print (line.strip('\n' )) i += 1 f3 = open ('sanguo.txt' , encoding='utf-8' ) print (f3.read().replace('\n' , '' ))
可以利用函数进行实现:
1 2 3 4 5 def func (filename ): print (open (filename).read()) print ('test func' )func('name.txt' )
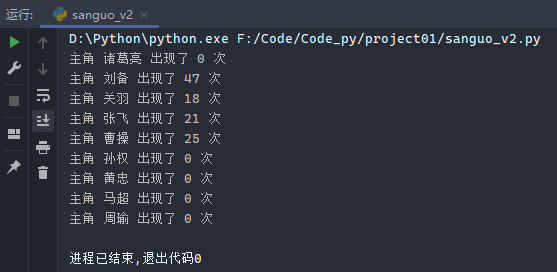
示例2:
1 2 3 4 5 6 7 8 9 10 11 12 13 14 15 16 17 18 import redef find_item (hero ): with open ('sanguo.txt' , encoding='utf-8' ) as f: data = f.read().replace('\n' , '' ) name_num = re.findall(hero, data) print ('主角 %s 出现了 %s 次' % (hero, len (name_num))) return name_num name_dict = {} with open ('name.txt' ) as f: for line in f: names = line.split('|' ) for n in names: name_num = find_item(n) name_dict[n] = name_num
运行结果:
7.2 函数的可变长操作
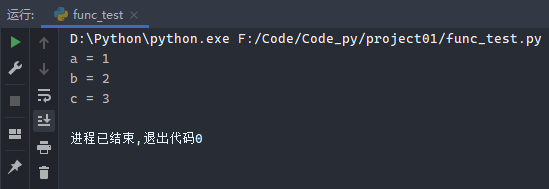
在函数中,需要按照顺序进行参数传入,如果想跳跃使用,则通过关键字参数来进行调用,示例如图:
示例1:
1 2 3 4 5 6 7 def func (a, b, c ): print ('a = %s' % a) print ('b = %s' % b) print ('c = %s' % c) func(1 , c=3 , b=2 )
运行结果:
示例2:
1 2 3 4 5 6 7 def howlong (first, *other ): print (1 + len (other)) howlong(10 , 20 , 30 ) howlong(2 )
运行结果:
7.3 函数的变量作用域
当函数外部的变量赋值后,在函数内部使用相同名称的变量时,会默认使用函数外部的变量;如果在函数内部对变量进行重新赋值,则会新建一个函数内部的变量,该变量的名称和函数外部定义的变量名称相同。
示例1:
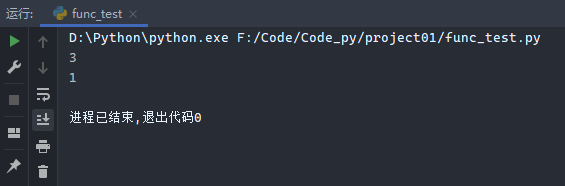
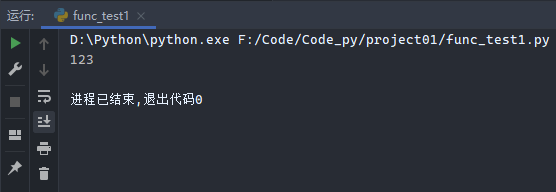
1 2 3 4 5 6 var1 = 123 def func (): print (var1) func()
运行结果:
示例2:
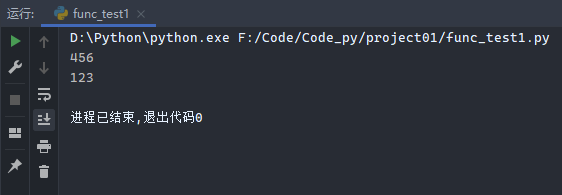
1 2 3 4 5 6 7 8 9 var1 = 123 def func (): var1 = 456 print (var1) func() print (var1)
运行结果:
示例3:
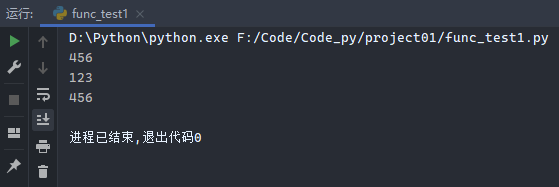
1 2 3 4 5 6 7 8 9 10 11 12 var1 = 123 def func (): global var2 var2 = 456 print (var2) func() print (var1)print (var2)
运行结果:
7.4 函数的迭代器和生成器
7.4.1 迭代器
示例:
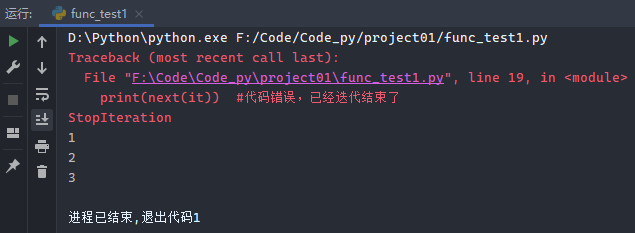
1 2 3 4 5 6 list1 = (1 , 2 , 3 ) it = iter (list1) print (next (it))print (next (it))print (next (it))print (next (it))
运行结果:
7.4.2 生成器
示例:
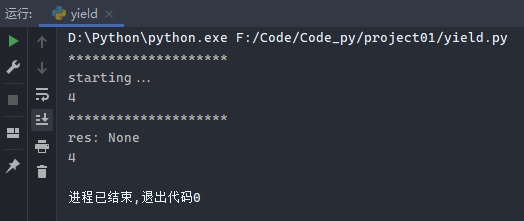
1 2 3 4 5 6 7 8 9 10 11 def foo (): print ("starting..." ) while True : res = yield 4 print ("res:" , res) g = foo() print ("*" * 20 )print (next (g))print ("*" * 20 )print (next (g))
运行结果:
分析:20),输出20个 res:None。
示例2:
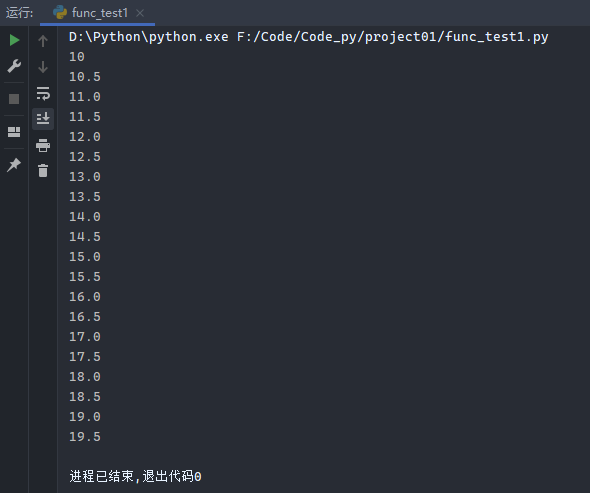
1 2 3 4 5 6 7 8 9 def frange (star, stop, step ): x = star while x < stop: yield x x += step for i in frange(10 , 20 , 0.5 ): print (i)
运行结果:
7.5 lambda表达式
示例1 :将lambda函数赋值给一个变量,通过这个变量间接调用该lambda函数。
通过传统的方法定义函数:
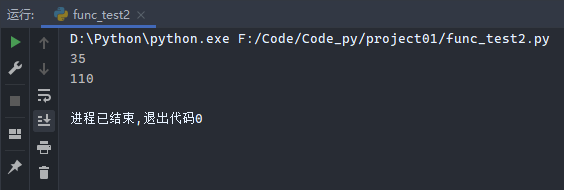
1 2 3 def sum (x,y ): return x+y print (sum (5 ,9 ))
通过lambda的方法定义函数:
1 2 add = lambda x, y: x + y print (add(5 , 9 ))
示例2 :将lambda函数作为参数传递给其他函数。部分Python内置函数接收函数作为参数。
通过传统方式:
1 2 3 4 5 def odd (x ): return x%2 temp = range (10 ) show = filter (odd,temp) print (list (show))
通过lambda函数实现:
1 print (list (filter (lambda x: x%2 ,range (10 ))))
此时lambda函数用于指定过滤列表元素的条件。
示例3 :将lambda函数作为其他函数的返回值,返回给调用者。
函数的返回值也可以是函数。例如return lambda x, y: x+y返回一个加法函数。这时,lambda函数实际上是定义在某个函数内部的函数,称之为嵌套函数,或者内部函数。对应的,将包含嵌套函数的函数称之为外部函数。内部函数能够访问外部函数的局部变量,这个特性是闭包(Closure)编程的基础。
示例4 :将lambda函数赋值给其他函数,从而将其他函数用该lambda函数替换。
例如:为了把标准库time中的函数sleep的功能屏蔽(Mock),我们可以在程序初始化时调用:time.sleep=lambda x:None。这样,在后续代码中调用time库的sleep函数将不会执行原有的功能。例如,执行time.sleep(3)时,程序不会休眠3秒钟,而是什么都不做
示例5 :将if...else语句缩减为单一的条件表达式,
语法 :expression1 if A else expression2
如果A为True,条件表达式的结果为expression1,否则为expression2
1 2 3 4 5 6 7 def s (x ): if x==1 : return "yes" else : return "no" print (s(0 ))print (s(1 ))
使用lambda函数:
1 2 3 s = lambda x:"yes" if x==1 else "no" print (s(0 ))print (s(1 ))
7.6 Python内建函数
7.6.1filter函数
filter函数:
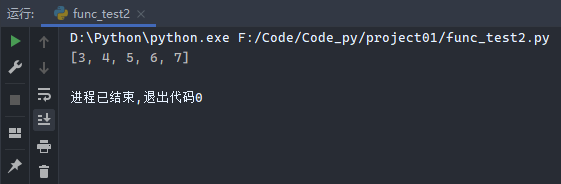
1 2 a = (1 , 2 , 3 , 4 , 5 , 6 , 7 ) print (list (filter (lambda x: x > 2 , a)))
运行结果:
7.6.2 map函数
map函数:
1 2 a = [1 , 2 , 3 ] print (list (map (lambda x: x + 1 , a)))
运行结果:
7.6.3 reduce函数
reduce函数:
reduce函数不能直接使用,在终端中通过from functools import reduce命令导入相应的函数包,然后才能使用reduce函数。
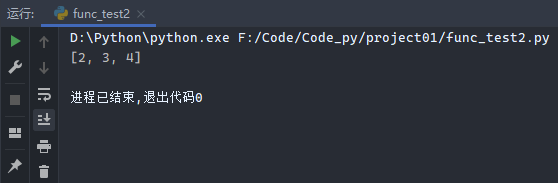
1 2 3 4 from functools import reducereduce(lambda x, y: x + y, [2 , 3 , 4 ], 1 )
运行结果:
7.6.4 zip函数
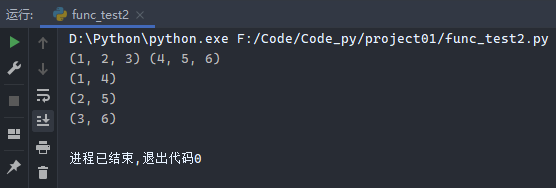
zip函数:zip() 函数用于将可迭代的对象作为参数,将对象中对应的元素打包成一个个元组,然后返回由这些元组组成的列表。
示例1:
1 2 3 4 print ((1 , 2 , 3 ), (4 , 5 , 6 ))for i in zip ((1 , 2 , 3 ), (4 , 5 , 6 )): print (i)
运行结果:
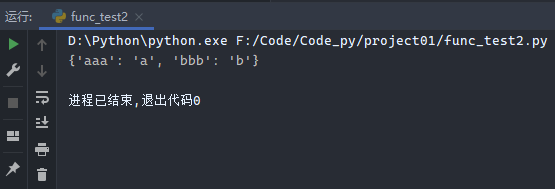
示例2:
1 2 3 dicta = {'a' : 'aaa' , 'b' : 'bbb' } dictb = zip (dicta.values(), dicta.keys()) print (dict (dictb))
运行结果:
7.7 闭包
闭包概念:在一个内部函数中,对外部作用域的变量进行引用,(并且一般外部函数的返回值为内部函数),那么内部函数就被认为是闭包。
示例1:
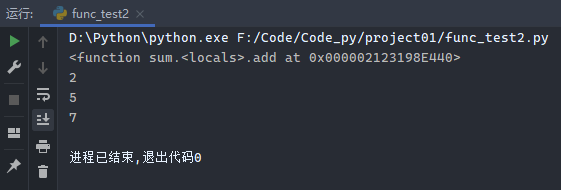
1 2 3 4 5 6 7 8 9 10 11 12 13 14 15 16 17 18 def sum (a ): def add (b ): print (a) print (b) return a + b return add num2 = sum (2 ) print (num2)print (num2(5 ))
运行结果:
示例2:
1 2 3 4 5 6 7 8 9 10 11 12 13 14 15 16 17 18 19 20 def counter (a ): cnt = [a] def add_one (): cnt[0 ] += 1 return cnt[0 ] return add_one num5 = counter(5 ) print (num5())print (num5())print (num5())print (num5())num9 = counter(9 ) print (num9())print (num9())print (num9())
运行结果:
示例3:
1 2 3 4 5 6 7 8 9 10 11 def a_line (a, b ): def arg_y (x ): return a * x + b return arg_y line1 = a_line(3 , 5 ) line2 = a_line(5 , 10 ) print (line1(10 ))print (line2(20 ))
如果通过lambda来实现闭包,代码如下:
1 2 3 4 5 6 7 8 9 def a_line (a, b ): return lambda x: a * x + b line1 = a_line(3 , 5 ) line2 = a_line(5 , 10 ) print (line1(10 ))print (line2(20 ))
运行结果:
7.8 装饰器
装饰器的概念:装饰器(Decorators)是 Python 的一个重要部分。简单地说:他们是修改其他函数的功能的函数。他们有助于让我们的代码更简短,也更Pythonic(Python范儿)。
闭包和装饰器的不同点 :闭包传入的是变量,内部引用的是变量;装饰器传入的是函数,内部引用的也是函数。
示例1:
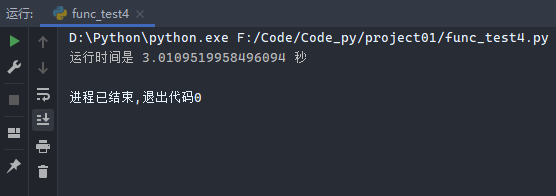
1 2 3 4 5 6 7 8 9 10 11 12 13 14 15 16 import timedef timer (func ): def wrapper (): start_time = time.time() func() stop_time = time.time() print ('运行时间是 %s 秒' % (stop_time - start_time)) return wrapper @timer def i_can_sleep (): time.sleep(3 ) i_can_sleep()
运行过程:首先运行到i_can_sleep()时,会自动寻找i_can_sleep()这个函数,发现这个函数被装饰,会跳转到timer这个装饰函数,将被装饰函数i_can_sleep()作为func传入,并运行wrapper()函数。
运行结果:
示例2:
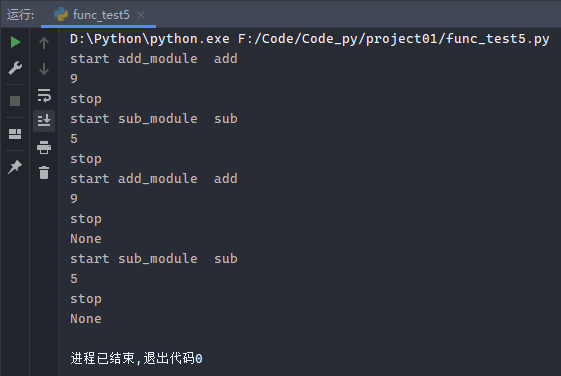
1 2 3 4 5 6 7 8 9 10 11 12 13 14 15 16 17 18 19 20 21 22 23 24 def new_tips (argv ): def tips (func ): def nei (a, b ): print ('start %s %s' % (argv, func.__name__)) func(a, b) print ('stop' ) return nei return tips @new_tips('add_module' def add (a, b ): print (a + b) @new_tips('sub_module' def sub (a, b ): print (a - b) add(4 , 5 ) sub(9 , 4 ) print (add(4 , 5 ))print (sub(9 , 4 ))
运行结果:
可以通过@装饰器来进行重复进行调用。
7.9 上下文管理器
通过with来进行上下文管理:
传统方式:
1 2 3 4 5 6 fd = open ('name.txt' ) try : for line in fd: print (line) finally : fd.close()
通过with来进行上下文管理:
1 2 3 with open ('name.txt' ) as f: for line in f: print (line)
8 模块
模块是在代码量变得相当大之后,为了将需要重复使用的有组织的代码段放在一起,这部分代码可以附加到现有程序中,附加的过程叫做导入(import)。
导入模块的一般写法:
import 模块名称from 模块名称 import 方法名
示例:
1 2 3 4 5 6 7 8 import os import time import matplotlib as m from time import sleep sleep()
新建一个mymod.py文件,并写入如下代码:
1 2 def print_me (): print ('me' )
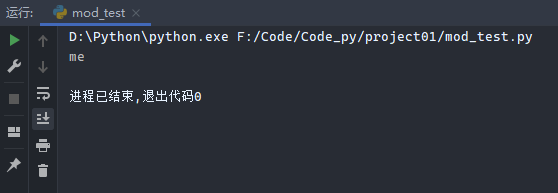
新建一个mod_test.py文件,并写入如下代码:
1 2 import mymodmymod.print_me()
运行结果:
9 面向对象编程
9.1 类与实例
示例1:
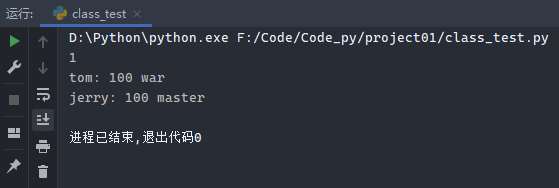
1 2 3 4 5 6 7 8 9 10 11 12 13 14 15 16 17 18 class Player (): def __init__ (self, name, hp, occu ): self.__name = name self.hp = hp self.occu = occu def print_role (self ): print ('%s: %s %s ' % (self.__name, self.hp, self.occu)) def updateName (self, newname ): self.__name = newname user1 = Player('tom' , 100 , 'war' ) user2 = Player('jerry' , 100 , 'master' ) print (1 )user1.print_role() user2.print_role()
运行结果:
示例2:
1 2 3 4 5 6 7 8 9 10 11 12 13 14 15 16 17 18 19 20 21 22 23 24 25 26 27 class Player (): def __init__ (self, name, hp, occu ): self.__name = name self.hp = hp self.occu = occu def print_role (self ): print ('%s: %s %s ' % (self.__name, self.hp, self.occu)) def updateName (self, newname ): self.__name = newname class New (): '定义怪物类' pass user1 = Player('tom' , 100 , 'war' ) user2 = Player('jerry' , 100 , 'master' ) print (1 )user1.print_role() user2.print_role() user1.updateName('wilson' ) user1.print_role() user1.__name = ('aaa' ) user1.print_role()
9.2 类的继承
示例1:
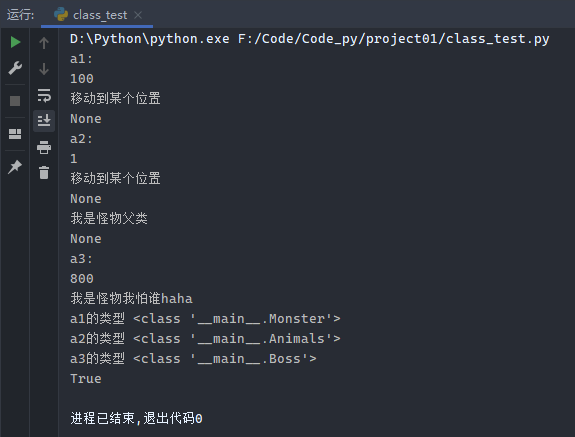
1 2 3 4 5 6 7 8 9 10 11 12 13 14 15 16 17 18 19 20 21 22 23 24 25 26 27 28 29 30 31 32 33 34 35 36 37 38 39 40 41 42 43 44 45 46 class Monster (): def __init__ (self, hp=90 ): self.hp = hp def run (self ): print ('移动到某个位置' ) def whoami (self ): print ('我是怪物父类' ) class Animals (Monster ): """普通的怪物""" def __init__ (self, hp=10 ): super ().__init__(hp) class Boss (Monster ): """Boss类怪物""" def __init__ (self, hp=1000 ): self.hp = hp def whoami (self ): print ('我是怪物我怕谁haha' ) a1 = Monster(100 ) print ('a1:' )print (a1.hp)print (a1.run())a2 = Animals(1 ) print ('a2:' )print (a2.hp)print (a2.run()) print (a2.whoami()) print ('a3:' )a3 = Boss(800 ) print (a3.hp)a3.whoami() print ('a1的类型 %s ' % type (a1))print ('a2的类型 %s ' % type (a2))print ('a3的类型 %s ' % type (a3))print (isinstance (a2, Monster))
运行结果:
示例2:
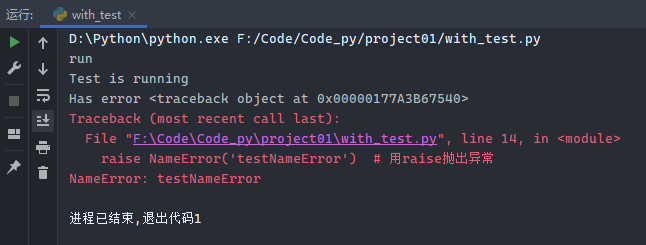
1 2 3 4 5 6 7 8 9 10 11 12 13 14 class Testwith (): def __enter__ (self ): print ('run' ) def __exit__ (self, exc_type, exc_val, exc_tb ): if exc_tb is None : print ('正常结束' ) else : print ('Has error %s ' % exc_tb) with Testwith(): print ('Test is running' ) raise NameError('testNameError' )
运行结果:
10 多线程编程
示例1:
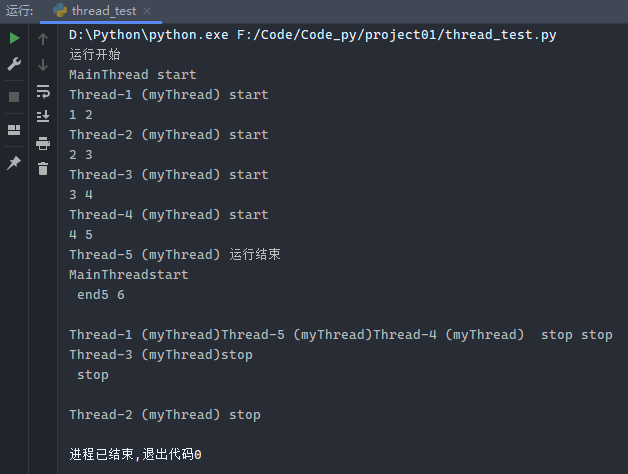
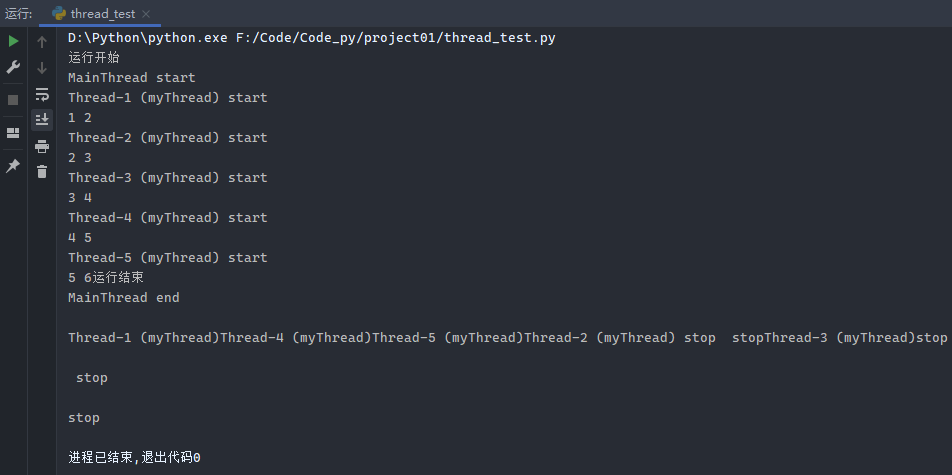
1 2 3 4 5 6 7 8 9 10 11 12 13 14 15 16 import threadingimport timefrom threading import current_threaddef myThread (arg1, arg2 ): print (current_thread().name, 'start' ) print ('%s %s' % (arg1, arg2)) time.sleep(1 ) print (current_thread().name, 'stop' ) print ('运行开始' )for i in range (1 , 6 ): t1 = threading.Thread(target=myThread, args=(i, i + 1 )) t1.start() print ('运行结束' )print (current_thread().name, 'end' )
运行分析:主线程运行结束才会运行
运行结果1:
运行结果2:
如果运行的多线程中某些线程先结束,希望该线程等待其他线程全部结束后再继续运行,则通过join的方法来实现。
示例2:
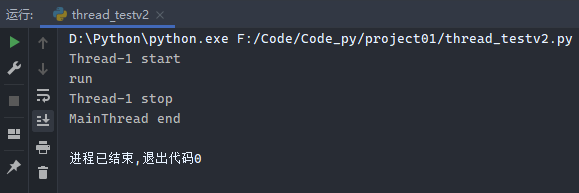
1 2 3 4 5 6 7 8 9 10 11 12 13 14 import threadingfrom threading import current_threadclass Mythread (threading.Thread): def run (self ): print (current_thread().name, 'start' ) print ('run' ) print (current_thread().name, 'stop' ) t1 = Mythread() t1.start() t1.join() print (current_thread().name, 'end' )
运行结果:
经典的生产者和消费者的问题:
示例:
1 2 3 4 5 6 7 8 9 10 11 12 13 14 15 16 17 18 19 20 21 22 23 24 25 26 27 28 29 30 31 32 33 34 35 36 37 38 39 40 41 42 43 44 45 46 47 48 49 50 from threading import Thread, current_threadimport timeimport randomfrom queue import Queuequeue = Queue(5 ) class ProducerThread (Thread ): def run (self ): name = current_thread().name nums = range (100 ) global queue while True : num = random.choice(nums) queue.put(num) print ('生产者 %s 生产了数据 %s' % (name, num)) t = random.randint(1 , 3 ) time.sleep(t) print ('生产者 %s 睡眠了 %s 秒' % (name, t)) class ConsumerThread (Thread ): def run (self ): name = current_thread().name global queue while True : num = queue.get() queue.task_done() print ('消费者 %s 消耗了数据 %s' % (name, num)) t = random.randint(1 , 5 ) time.sleep(t) print ('消费者 %s 睡眠了 %s 秒' % (name, t)) p1 = ProducerThread(name='p1' ) p1.start() p2 = ProducerThread(name='p2' ) p2.start() p3 = ProducerThread(name='p3' ) p3.start() c1 = ConsumerThread(name='c1' ) c1.start() c2 = ConsumerThread(name='c2' ) c2.start() c3 = ConsumerThread(name='c3' ) c3.start() c4 = ConsumerThread(name='c4' ) c4.start()
运行分析:如果生产者多余消费者,当队列中存放的数据满了之后,则生产者将不再生产数据,只要当消耗着消耗部分后,队列中有多余位置,才会产生数据。
11 标准库
Python官方文档对应地址:https://docs.python.org/3/library/index.html
Python常用的标准库:
Built-in Types
Text Processing Services
Data Types
Generic Operating System Services
Internet Data Handling
Development Tools
Debugging and Profiling
11.1 正则表达式库 - re
11.1.1 正则表达式元字符
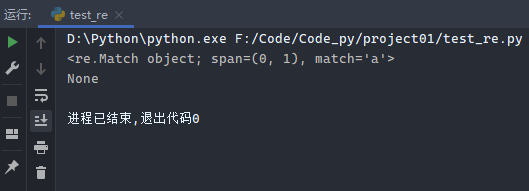
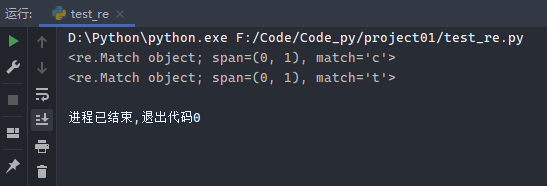
示例1:匹配相同字符
1 2 3 4 5 import rep = re.compile ('a' ) print (p.match('a' ))print (p.match('b' ))
运行结果:
示例2:.可以匹配所有任意的单个字符
1 2 3 4 5 import red = re.compile ('.' ) print (d.match('c' ))print (d.match('t' ))
运行结果:
示例3:^以什么作为开头,从开头进行搜索
示例4:$以什么作为结尾,从后面往前面进行匹配,比如以d = re.compile('jpg$')表示以jpg作为结尾,来进行检索。
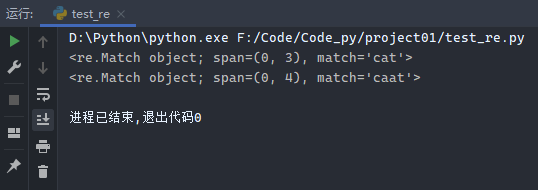
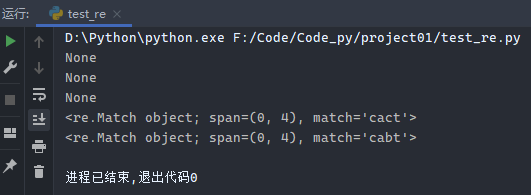
示例5:*表示匹配前面的字符出现0次到多次
1 2 3 4 5 import reb = re.compile ('ca*t' ) print (b.match('cat' ))print (b.match('caat' ))
运行结果:
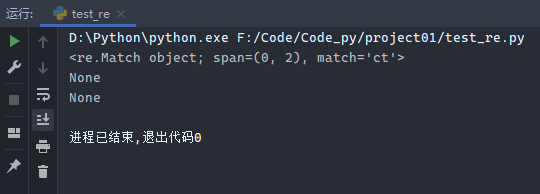
示例6:?代表字符出现0次或1次
1 2 3 4 5 6 import reb = re.compile ('c?t' ) print (b.match('ct' ))print (b.match('cat' ))print (b.match('caaat' ))
运行结果:
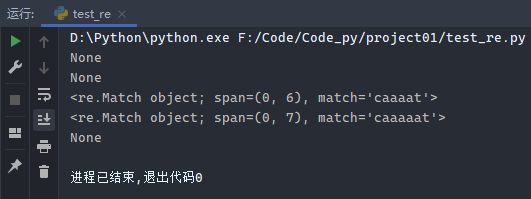
示例7:{内容}表示前面字符出现指定次数
1 2 3 4 5 6 7 8 import reb = re.compile ('ca{4,6}t' ) print (b.match('ct' ))print (b.match('cat' ))print (b.match('caaaat' ))print (b.match('caaaaat' ))print (b.match('caaaaaaat' ))
运行结果:
示例8:[内容]表示匹配方括号中的任意一个字符
1 2 3 4 5 6 7 8 import reb = re.compile ('ca[abcd]t' ) print (b.match('ct' ))print (b.match('cat' ))print (b.match('caabcdt' ))print (b.match('cact' ))print (b.match('cabt' ))
运行结果:
示例9:\d用来匹配多个数字字符[0-9](多个[0-9]也可以用[0-9]+表示)
示例10:\D用来匹配非数字字符
示例11:\s表示匹配的是字符串
示例12:.*?表示不匹配贪婪模式,例如下面的内容
如果使用.*?不匹配贪婪模式,则只会匹配第一行,不会匹配所有的行。
11.1.2 正则表达式分组功能
示例1:
1 2 3 4 5 6 7 8 9 10 11 12 import reb = re.compile ('ca...t' ) print (b.match('cat' ))print (b.match('caabct' ))print (b.match('cact' ))print ('**********' )c = re.compile ('ca.{2}t' ) print (c.match('cat' ))print (c.match('cact' ))print (c.match('cacbt' ))
运行结果:
11.1.3 正则表达式中match和search的区别
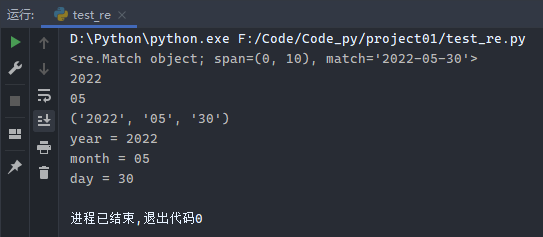
示例1:
1 2 3 4 5 6 7 8 9 10 11 import reb = re.compile (r'(\d+)-(\d+)-(\d+)' ) print (b.match('2022-05-30' ))print (b.match('2022-05-30' ).group(1 ))print (b.match('2022-05-30' ).group(2 ))print (b.match('2022-05-30' ).groups())(year, month, day) = b.match('2022-05-30' ).groups() print ('year = %s' % year)print ('month = %s' % month)print ('day = %s' % day)
运行结果:
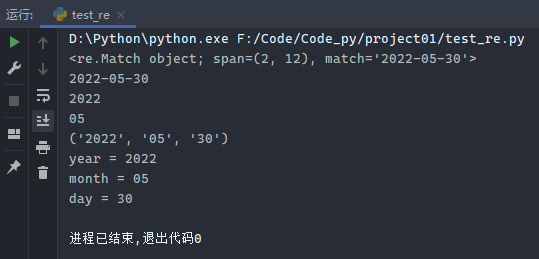
示例2:
1 2 3 4 5 6 7 8 9 10 11 12 import reb = re.compile (r'(\d+)-(\d+)-(\d+)' ) print (b.search('aa2022-05-30bbb' ))print (b.search('aa2022-05-30bbb' ).group()) print (b.search('aa2022-05-30bbb' ).group(1 ))print (b.search('aa2022-05-30bbb' ).group(2 ))print (b.search('aa2022-05-30bbb' ).groups())(year, month, day) = b.search('aa2022-05-30bbb' ).groups() print ('year = %s' % year)print ('month = %s' % month)print ('day = %s' % day)
运行结果:
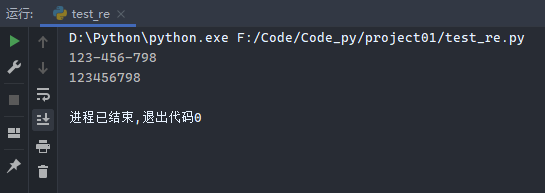
11.1.4 正则表达式替换函数sub()
示例1:
1 2 3 4 5 6 7 8 9 import rephone = '123-456-798 # 这是电话号码' p2 = re.sub(r'#.*$' , '' , phone) print (p2)p3 = re.sub(r'\D' , '' , p2) print (p3)
运行结果:
11.2 日期与时间函数库
time模块多数是用来查看日期和时间
示例1:
1 2 3 4 5 6 import timeprint (time.time()) print (time.localtime())print (time.strftime('%Y-%m-%d %H:%M:%S' ))print (time.strftime('%Y%m%d' ))
运行结果:
datetime多用于时间的修改
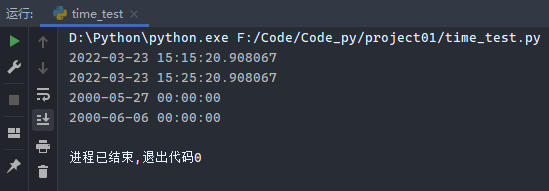
示例2:
1 2 3 4 5 6 7 8 9 10 import datetimeprint (datetime.datetime.now())newtime = datetime.timedelta(minutes=10 ) print (datetime.datetime.now() + newtime)one_day = datetime.datetime(2000 , 5 , 27 ) print (one_day)new_date = datetime.timedelta(days=10 ) print (one_day + new_date)
运行结果:
11.3 数学相关库
数学相关的库为:Numeric and Mathmatical Modules
示例:
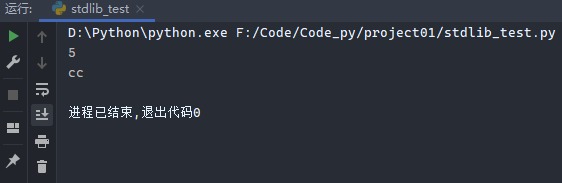
1 2 3 4 import randomprint (random.randint(1 , 5 )) print (random.choice(['aa' , 'bb' , 'cc' ]))
运行结果:
11.4 对文件和文件夹操作库
在Linux的终端中,常用操作命令:
1 2 3 4 5 6 7 8 pwd cd .. cd /tmp cd ./tmp mkdir /tmp/a mkdir -p /tmp/a rmdir g rm -rf /tmp/a
11.4.1 文件夹操作库-os.path
通过文件夹操作库对文件和文件夹进行操作
示例:
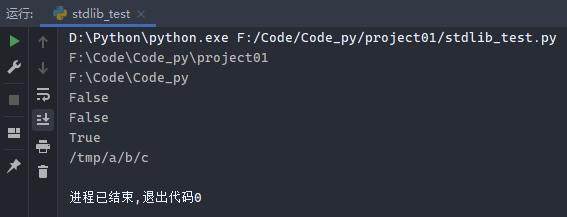
1 2 3 4 5 6 7 8 9 10 import osfrom os import pathprint (os.path.abspath('.' )) print (os.path.abspath('..' )) print (os.path.exists('/users' )) print (os.path.isfile('/Code/Code_py' )) print (os.path.isdir('/Code/Code_py' )) print (os.path.join('/tmp/a/' , 'b/c' ))
运行结果:
11.4.2 文件夹操作库-pathlib.Path
示例:
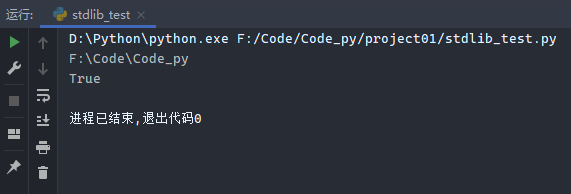
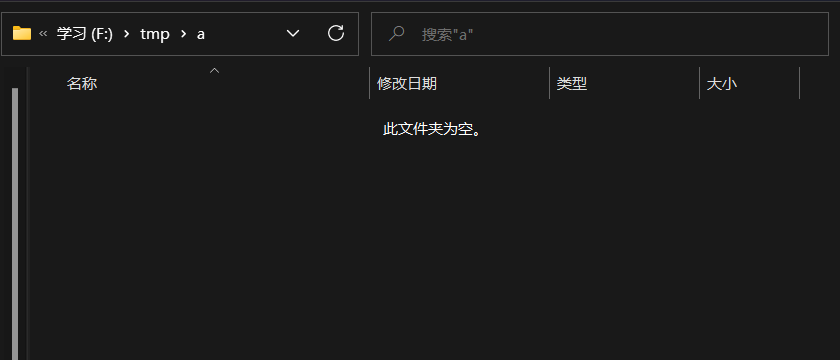
1 2 3 4 5 6 7 8 9 from pathlib import Pathp = Path('/Code/Code_py' ) print (p.resolve()) print (p.is_dir())q = Path('/tmp/a' ) Path.mkdir(q,parents=True )
运行结果:
可以看到该文件夹已经创建
12 机器学习
12.1 numpy库
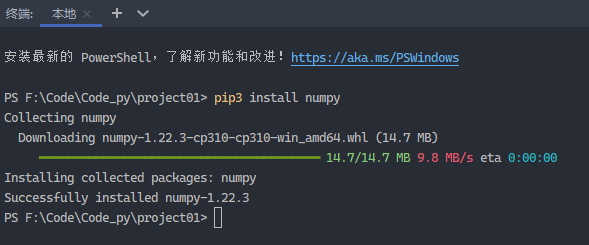
numpy库:用于高性能科学计算和数据分析,是常用的高级数据分析库的基础包,用numpy库的运行效率比python自身的运行效率更高。
需要在终端中通过pip3 install numpy命令来安装numpy库,运行效果:
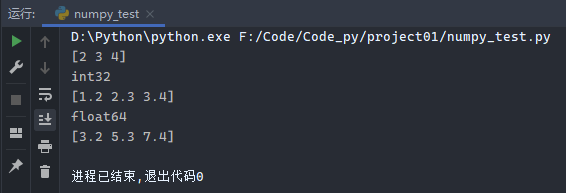
示例1:
1 2 3 4 5 6 7 8 9 10 11 12 import numpy as nparr1 = np.array([2 , 3 , 4 ]) print (arr1)print (arr1.dtype)arr2 = np.array([1.2 , 2.3 , 3.4 ]) print (arr2)print (arr2.dtype)print (arr1 + arr2)
运行结果:
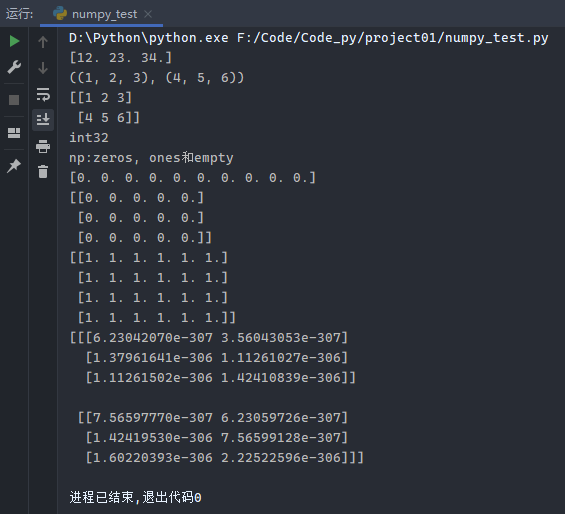
示例2:
1 2 3 4 5 6 7 8 9 10 11 12 13 14 15 16 import numpy as nparr2 = np.array([1.2 , 2.3 , 3.4 ]) print (arr2 * 10 )data = ((1 , 2 , 3 ), (4 , 5 , 6 )) print (data)arr3 = np.array((data)) print (arr3)print (arr3.dtype)print ('np:zeros, ones和empty:' )print (np.zeros(10 ))print (np.zeros((3 , 5 )))print (np.ones((4 ,6 )))print (np.empty((2 ,3 ,2 )))
运行结果:
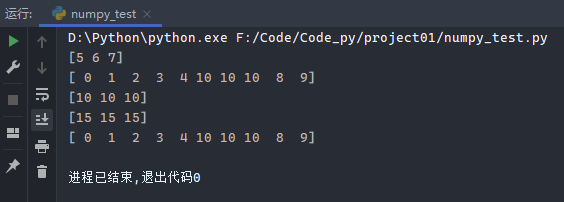
示例3:
1 2 3 4 5 6 7 8 9 10 11 import numpy as nparr4 = np.arange(10 ) print (arr4[5 :8 ])arr4[5 :8 ] = 10 print (arr4)arr_slice = arr4[5 :8 ].copy() print (arr_slice)arr_slice[:] = 15 print (arr_slice)print (arr4)
运行结果:
12.2 pandas库
pandas是用来数据预处理、数据清洗非常重要的库。
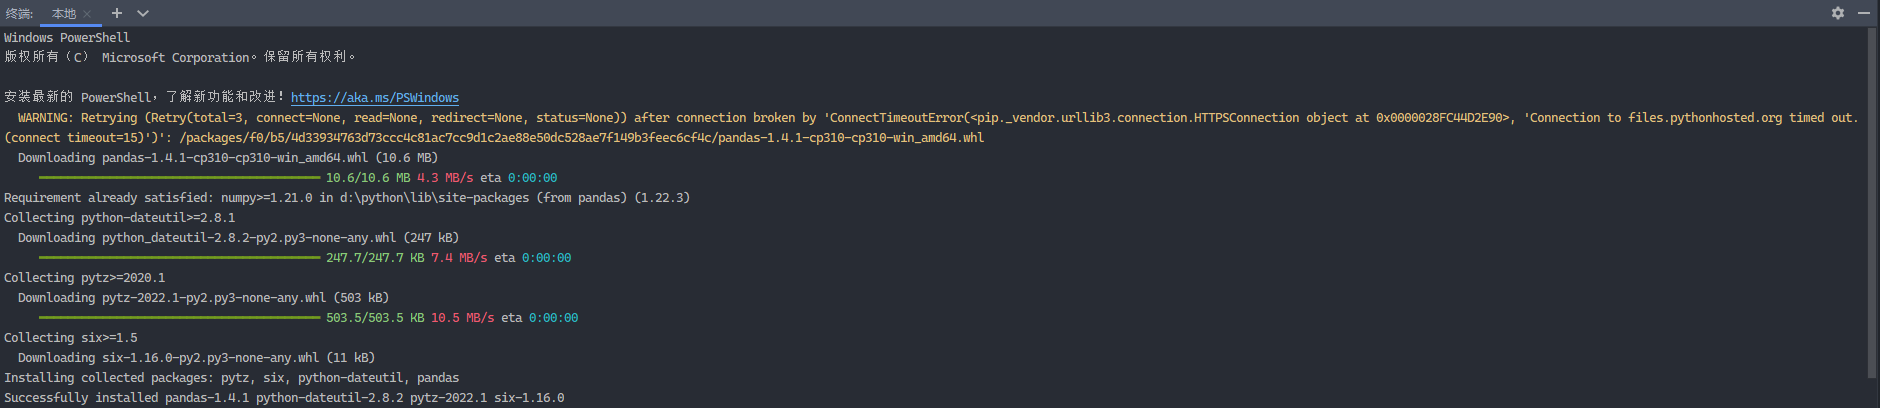
需要在终端中通过pip3 install pandas命令来安装pandas库,运行效果:
Series可以看作一维的字典,dataframe可以看作二维的字典。
12.2.1 Series数据结构
示例1:
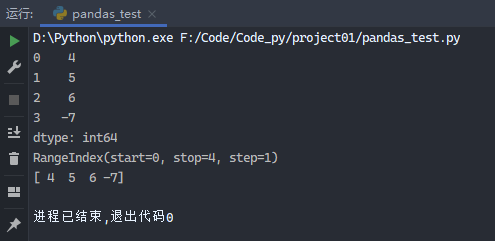
1 2 3 4 5 6 7 8 9 10 from pandas import Series, DataFrameimport pandas as pdobj = Series([4 , 5 , 6 , -7 ]) print (obj)print (obj.index)print (obj.values)
运行结果:
示例2:
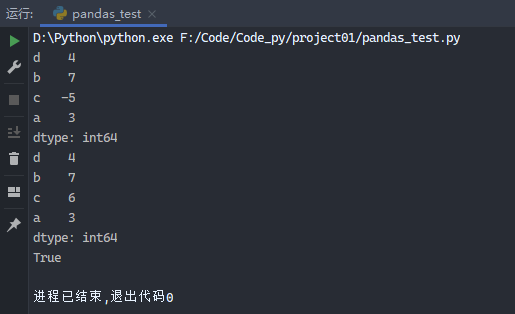
1 2 3 4 5 6 7 8 9 from pandas import Series, DataFrameimport pandas as pdobj2 = Series([4 , 7 , -5 , 3 ], index=['d' , 'b' , 'c' , 'a' ]) print (obj2)obj2['c' ] = 6 print (obj2)print ('a' in obj2)
运行结果:
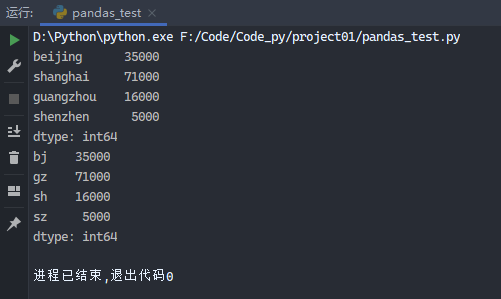
示例3:
1 2 3 4 5 6 7 8 9 10 11 12 13 from pandas import Series, DataFrameimport pandas as pdsdata = { 'beijing' : 35000 , 'shanghai' : 71000 , 'guangzhou' : 16000 , 'shenzhen' : 5000 } obj3 = Series(sdata) print (obj3)obj3.index = ['bj' , 'gz' , 'sh' , 'sz' ] print (obj3)
运行结果:
12.2.2 Dataframe数据结构
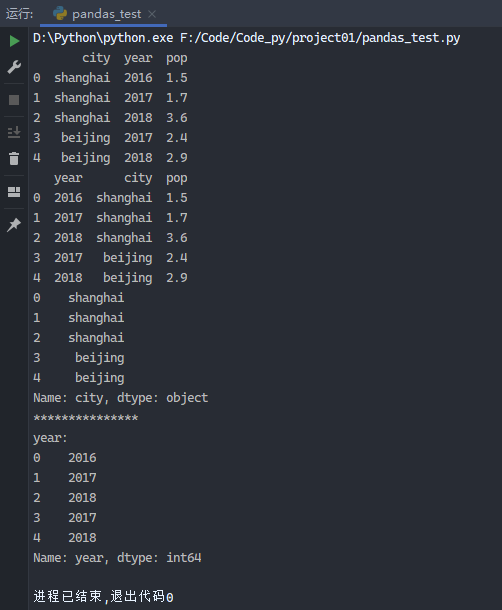
示例1:
1 2 3 4 5 6 7 8 9 10 11 12 13 14 15 16 from pandas import Series, DataFrameimport pandas as pddata = { 'city' : [ 'shanghai' , 'shanghai' , 'shanghai' , 'beijing' , 'beijing' ], 'year' : [ 2016 , 2017 , 2018 , 2017 , 2018 ], 'pop' : [ 1.5 , 1.7 , 3.6 , 2.4 , 2.9 ]} frame = DataFrame(data) print (frame)frame2 = DataFrame(data, columns=['year' , 'city' , 'pop' ]) print (frame2)print (frame2['city' ])print ('***************' )print ('year:' )print (frame2.year)
运行结果:
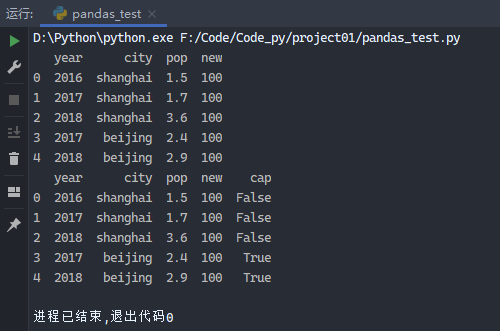
示例2:
1 2 3 4 5 6 7 8 9 10 11 12 13 14 15 from pandas import Series, DataFrameimport pandas as pddata = { 'city' : [ 'shanghai' , 'shanghai' , 'shanghai' , 'beijing' , 'beijing' ], 'year' : [ 2016 , 2017 , 2018 , 2017 , 2018 ], 'pop' : [ 1.5 , 1.7 , 3.6 , 2.4 , 2.9 ]} frame = DataFrame(data) frame2 = DataFrame(data, columns=['year' , 'city' , 'pop' ]) frame2['new' ] = 100 print (frame2) frame2['cap' ] = frame2.city == 'beijing' print (frame2)
运行结果:
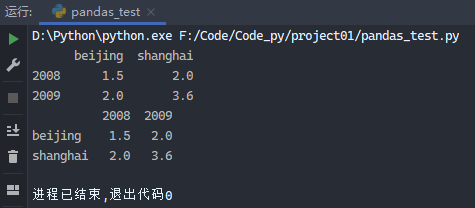
示例3:
1 2 3 4 5 6 7 8 from pandas import Series, DataFrameimport pandas as pdpop = {'beijing' : {2008 : 1.5 , 2009 : 2.0 }, 'shanghai' : {2008 : 2.0 , 2009 : 3.6 }} frame3 = DataFrame(pop) print (frame3)print (frame3.T)
运行结果:
示例4:
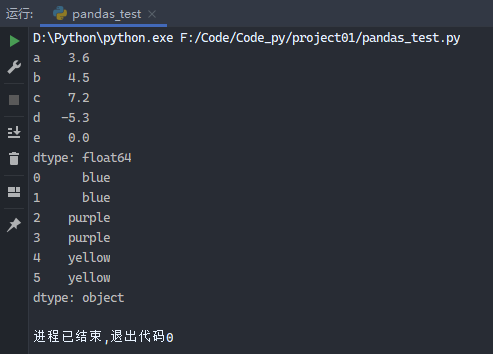
1 2 3 4 5 6 7 8 9 from pandas import Series, DataFrameimport pandas as pdobj4 = Series([4.5 , 7.2 , -5.3 , 3.6 ], index=['b' , 'c' , 'd' , 'a' ]) obj5 = obj4.reindex(['a' , 'b' , 'c' , 'd' , 'e' ], fill_value=0 ) print (obj5)obj6 = Series(['blue' , 'purple' , 'yellow' ], index=[0 , 2 , 4 ]) print (obj6.reindex(range (6 ), method='ffill' ))
运行结果:
示例5:
1 2 3 4 5 6 7 from pandas import Series, DataFrameimport pandas as pdfrom numpy import nan as NAdata = Series([1 , NA, 2 ]) print (data)print (data.dropna())
运行结果:
示例6:
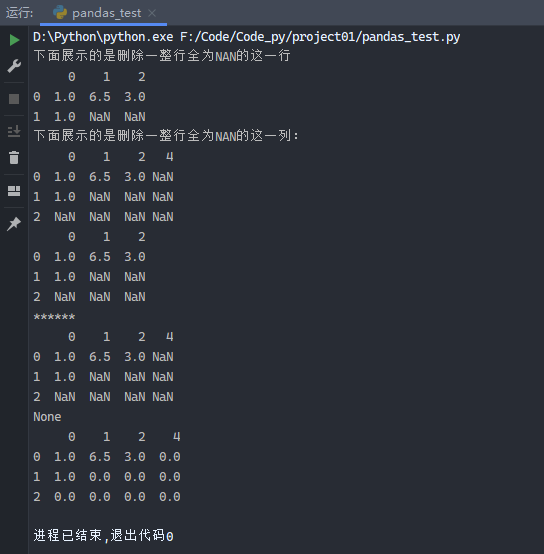
1 2 3 4 5 6 7 8 9 10 11 12 13 14 15 16 17 18 from pandas import Series, DataFrameimport pandas as pdfrom numpy import nan as NAdata2 = DataFrame([[1. , 6.5 , 3 ], [1. , NA, NA], [NA, NA, NA]]) print ('下面展示的是删除一整行全为NAN的这一行' )print (data2.dropna(how='all' ))data2[4 ] = NA print ('下面展示的是删除一整行全为NAN的这一列:' )print (data2)print (data2.dropna(axis=1 , how='all' ))data2.fillna(0 ) print (('******' ))print (data2)data2.fillna(0 , inplace=True ) print (data2.fillna(0 , inplace=True ))print (data2)
运行结果:
12.2.3 层次化索引
pandas支持多层次索引
示例1:
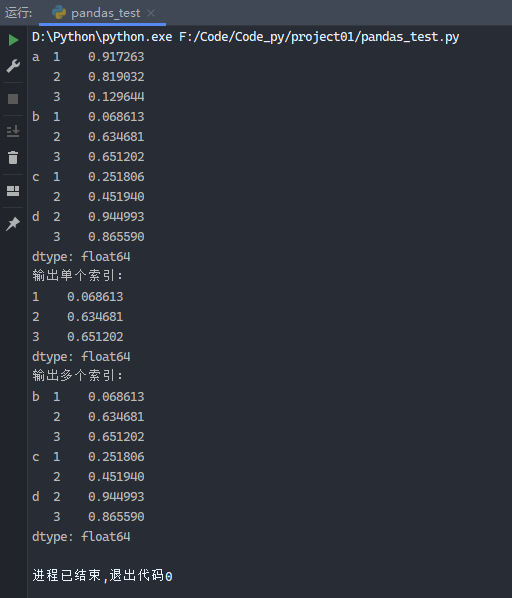
1 2 3 4 5 6 7 8 9 10 from pandas import Series, DataFrameimport numpy as npdata3 = Series(np.random.random(10 ), index=[ ['a' , 'a' , 'a' , 'b' , 'b' , 'b' , 'c' , 'c' , 'd' , 'd' ], [1 , 2 , 3 , 1 , 2 , 3 , 1 , 2 , 2 , 3 ]]) print (data3)print ('输出单个索引:' )print (data3['b' ])print ('输出多个索引:' )print (data3['b' :'d' ])
运行结果:
示例2:
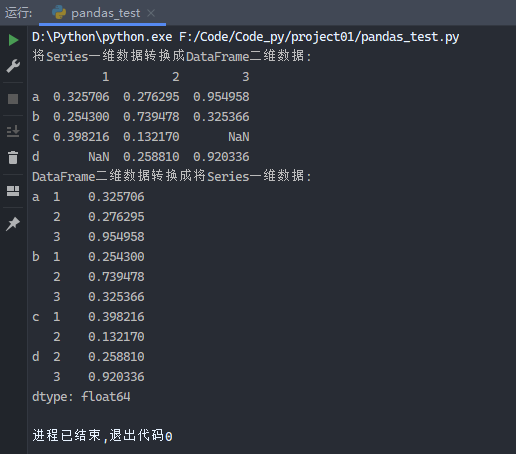
1 2 3 4 5 6 7 8 9 from pandas import Series, DataFrameimport numpy as npdata3 = Series(np.random.random(10 ), index=[ ['a' , 'a' , 'a' , 'b' , 'b' , 'b' , 'c' , 'c' , 'd' , 'd' ], [1 , 2 , 3 , 1 , 2 , 3 , 1 , 2 , 2 , 3 ]]) print ('将Series一维数据转换成DataFrame二维数据:' )print (data3.unstack())print ('DataFrame二维数据转换成将Series一维数据:' )print (data3.unstack().stack())
运行结果:
12.3 matplotlib库
matplotlib库主要用于绘图。
需要在终端中通过pip3 install matplotlib命令来安装matplotlib库。
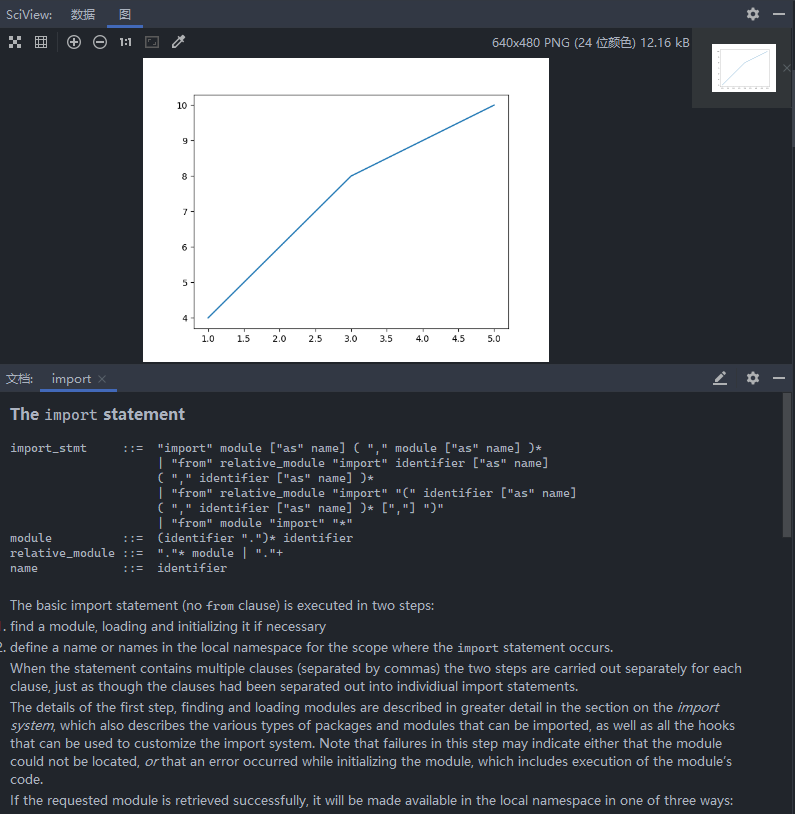
示例:
1 2 3 4 import matplotlib .pyplot as pltplt.plot([1 ,3 ,5 ],[4 ,8 ,10 ]) plt.show()
运行结果:
示例2:
1 2 3 4 5 6 7 import matplotlib .pyplot as pltimport numpy as npx = np.linspace(-np.pi, np.pi, 100 ) plt.plot(x, np.sin(x)) plt.show()
运行结果:
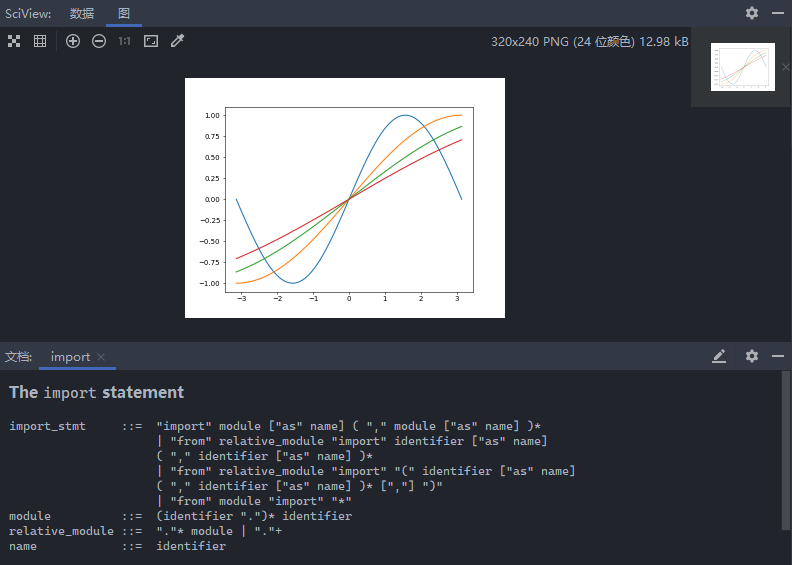
示例3:
1 2 3 4 5 6 7 8 9 import matplotlib .pyplot as pltimport numpy as npx = np.linspace(-np.pi, np.pi, 100 ) plt.figure(1 , dpi=50 ) for i in range (1 , 5 ): plt.plot(x, np.sin(x / i)) plt.show()
运行结果:
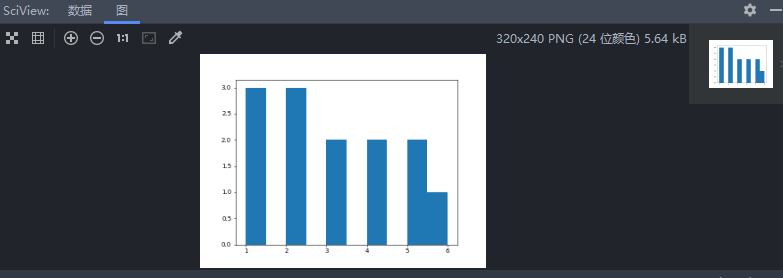
示例4:
1 2 3 4 5 6 import matplotlib .pyplot as pltplt.figure(1 , dpi=50 ) data = [1 , 1 , 1 , 2 , 2 , 2 , 3 , 3 , 4 , 5 , 5 , 6 , 4 ] plt.hist(data) plt.show()
运行结果:
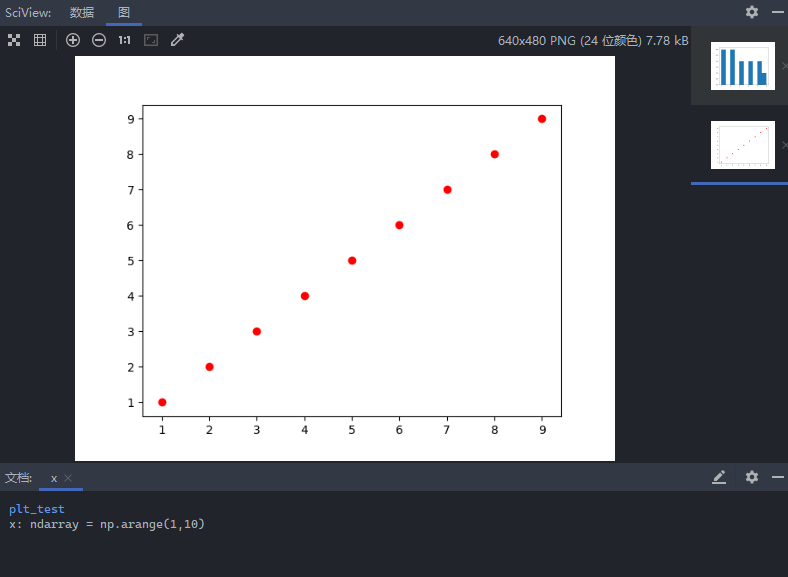
示例4:
1 2 3 4 5 6 7 8 import matplotlib .pyplot as pltimport numpy as npx = np.arange(1 ,10 ) y = x fig = plt.figure() plt.scatter(x,y,c = 'r' ,marker='o' ) plt.show()
运行结果:
12.4 seaborn库
需要在终端中通过pip3 install seaborn命令来安装seaborn库。
12.5 tensorflow库
需要在终端中通过pip3 install tensorflow命令来安装tensorflow库。
13 爬虫
常用的网络库包括:
urllib库:数据收集和下载的库
requests库:数据收集和下载的库
BeautifulSoup库:格式处理
http协议常用库
http协议常用库
xml格式处理库
httpbin.org是测试http协议的网站,可以通过它测试http功能。
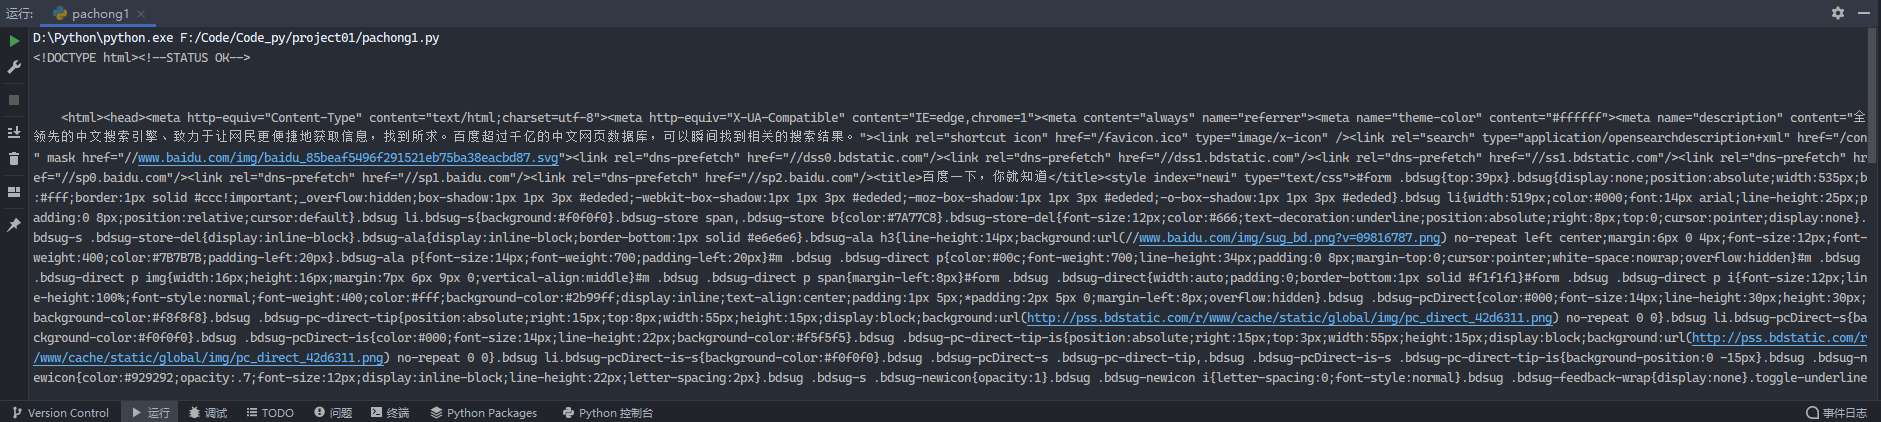
示例1:
1 2 3 4 5 from urllib import requesturl = 'http://www.baidu.com' response = request.urlopen(url, timeout=1 ) print (response.read().decode('utf-8' ))
运行结果:
示例2:
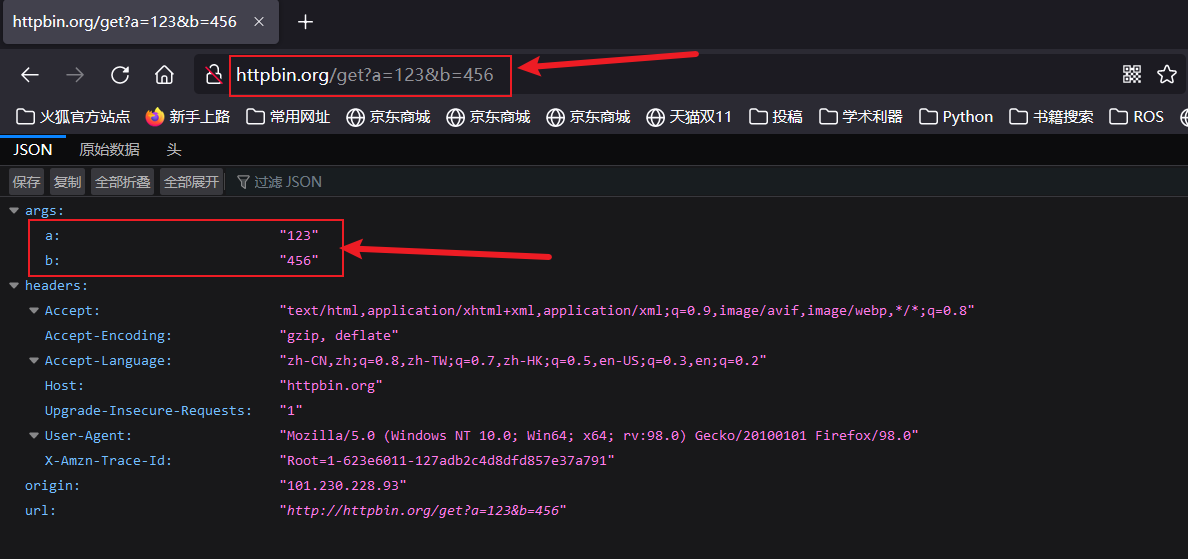
可以通过输入httpbin.org/get?a=123&b=456来告诉服务器a的值为123,b的值为456。
通过上面的get来往服务器传递数据,有传输数据大小的限制。还有另一种向服务器传递数据的限制,向服务器提供密码的时候会用post来进行提交。
示例3:
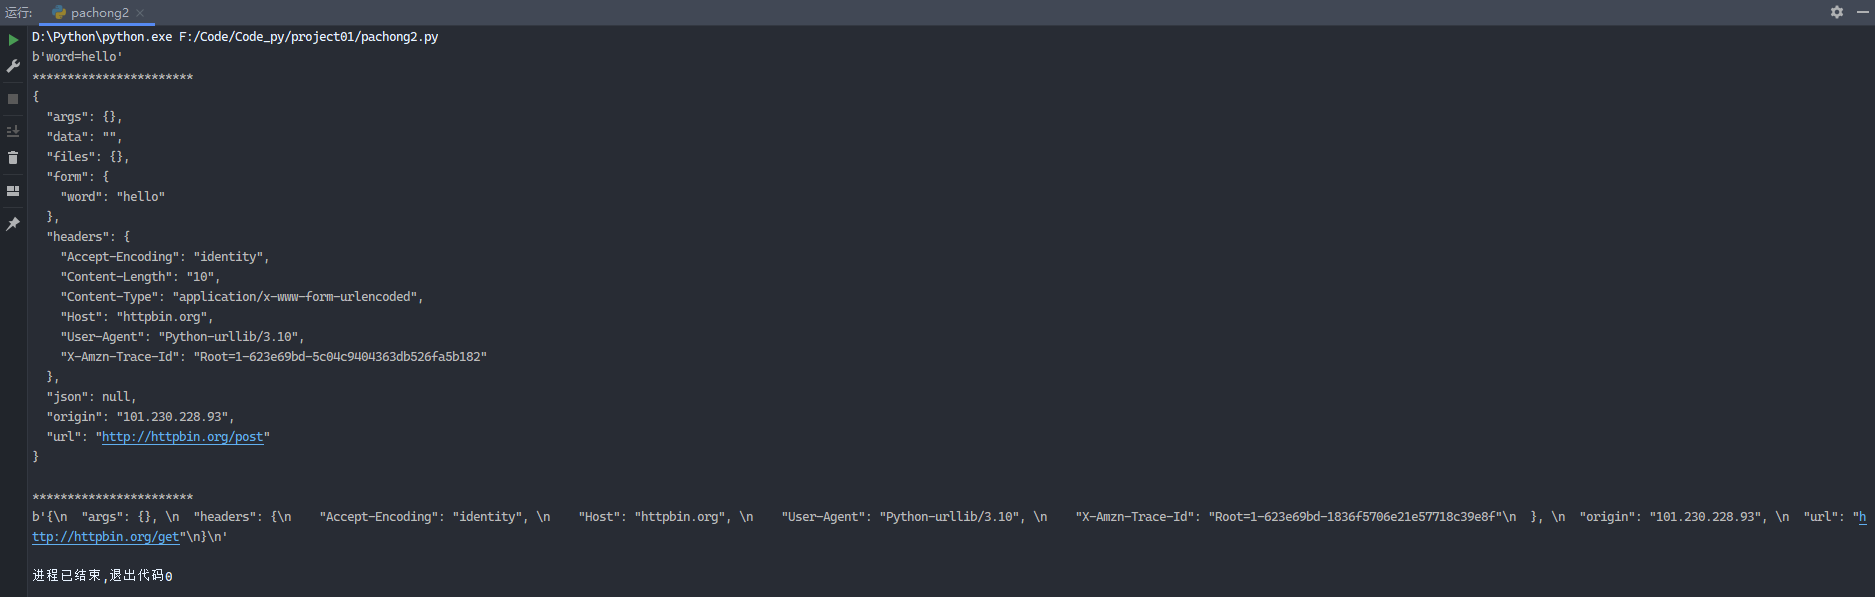
1 2 3 4 5 6 7 8 9 10 11 12 13 from urllib import parsefrom urllib import requestdata = bytes (parse.urlencode({'word' : 'hello' }), encoding='utf-8' ) print (data)print ('***********************' )response = request.urlopen('http://httpbin.org/post' , data=data) print (response.read().decode('utf-8' ))print ('***********************' )response2 = request.urlopen('http://httpbin.org/get' , timeout=1 ) print (response2.read())
运行结果:
示例4:
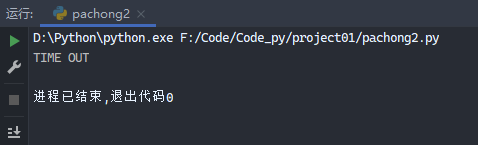
1 2 3 4 5 6 7 8 9 10 11 from urllib import parsefrom urllib import requestimport socketimport urllibtry : response3 = request.urlopen('http://httpbin.org/get' , timeout=0.1 ) except urllib.error.URLError as e: if isinstance (e.reason, socket.timeout): print ('TIME OUT' )
运行结果:
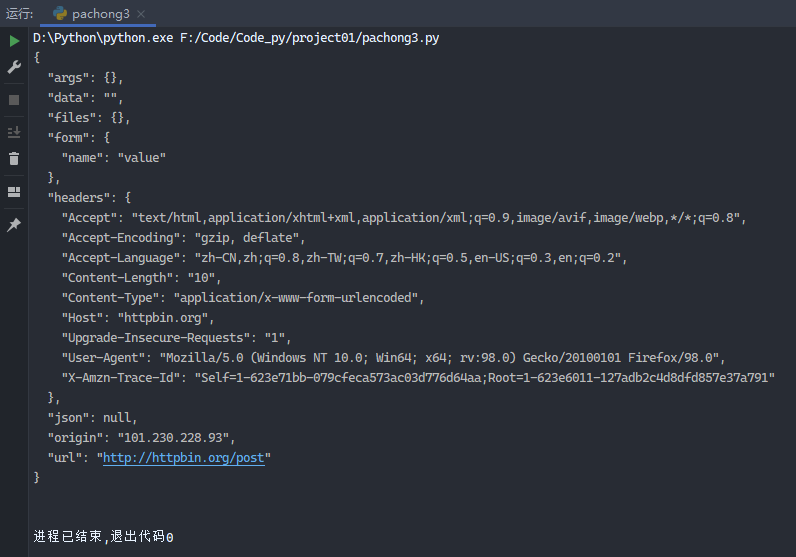
示例5:用headers来伪装头部
1 2 3 4 5 6 7 8 9 10 11 12 13 14 15 16 17 18 19 20 from urllib import request,parseurl = 'http://httpbin.org/post' headers = { "Accept" : "text/html,application/xhtml+xml,application/xml;q=0.9,image/avif,image/webp,*/*;q=0.8" , "Accept-Encoding" : "gzip, deflate" , "Accept-Language" : "zh-CN,zh;q=0.8,zh-TW;q=0.7,zh-HK;q=0.5,en-US;q=0.3,en;q=0.2" , "Host" : "httpbin.org" , "Upgrade-Insecure-Requests" : "1" , "User-Agent" : "Mozilla/5.0 (Windows NT 10.0; Win64; x64; rv:98.0) Gecko/20100101 Firefox/98.0" , "X-Amzn-Trace-Id" : "Root=1-623e6011-127adb2c4d8dfd857e37a791" } dict = { 'name' :'value' } data = bytes (parse.urlencode(dict ), encoding='utf-8' ) req = request.Request(url=url,data=data,headers=headers,method='POST' ) response = request.urlopen(req) print (response.read().decode('utf-8' ))
运行结果:
需要在终端中通过pip3 install requests命令来安装requests库。
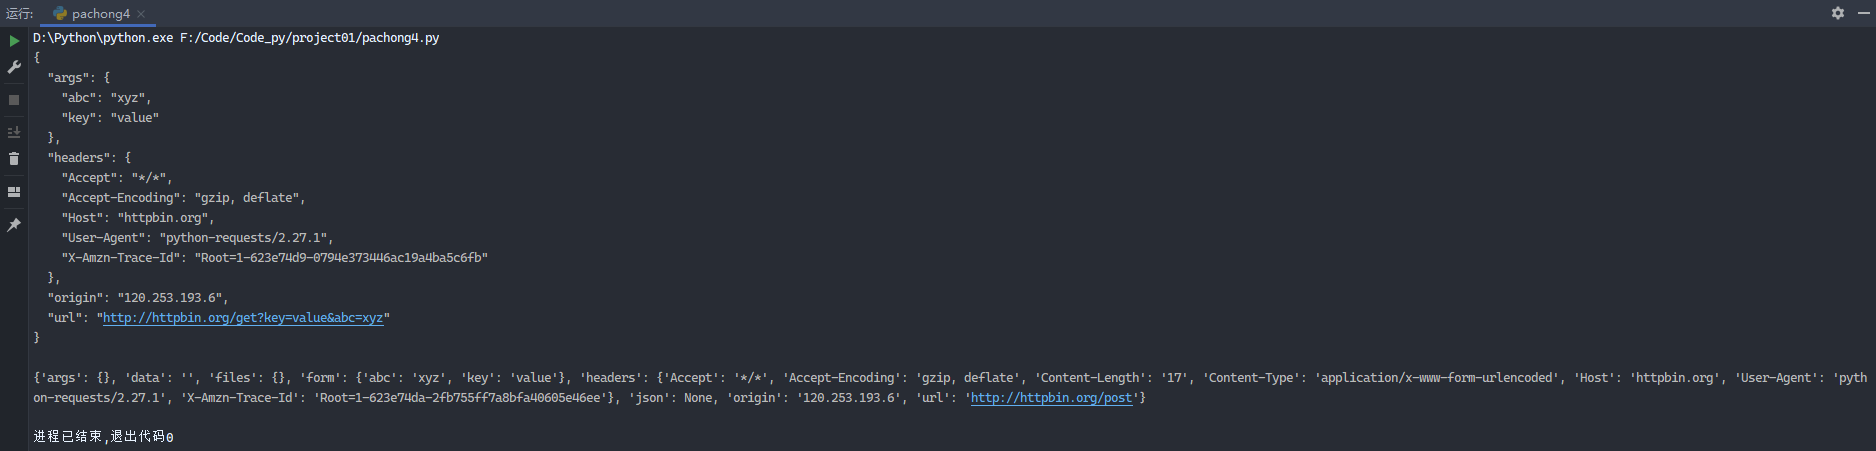
示例6:
1 2 3 4 5 6 7 8 9 10 11 12 13 14 15 16 import requestsurl = 'http://httpbin.org/get' data = {'key' : 'value' , 'abc' : 'xyz' } response = requests.get(url, data) print (response.text)url = 'http://httpbin.org/post' data = {'key' : 'value' , 'abc' : 'xyz' } response = requests.post(url, data) print (response.json())
运行结果:
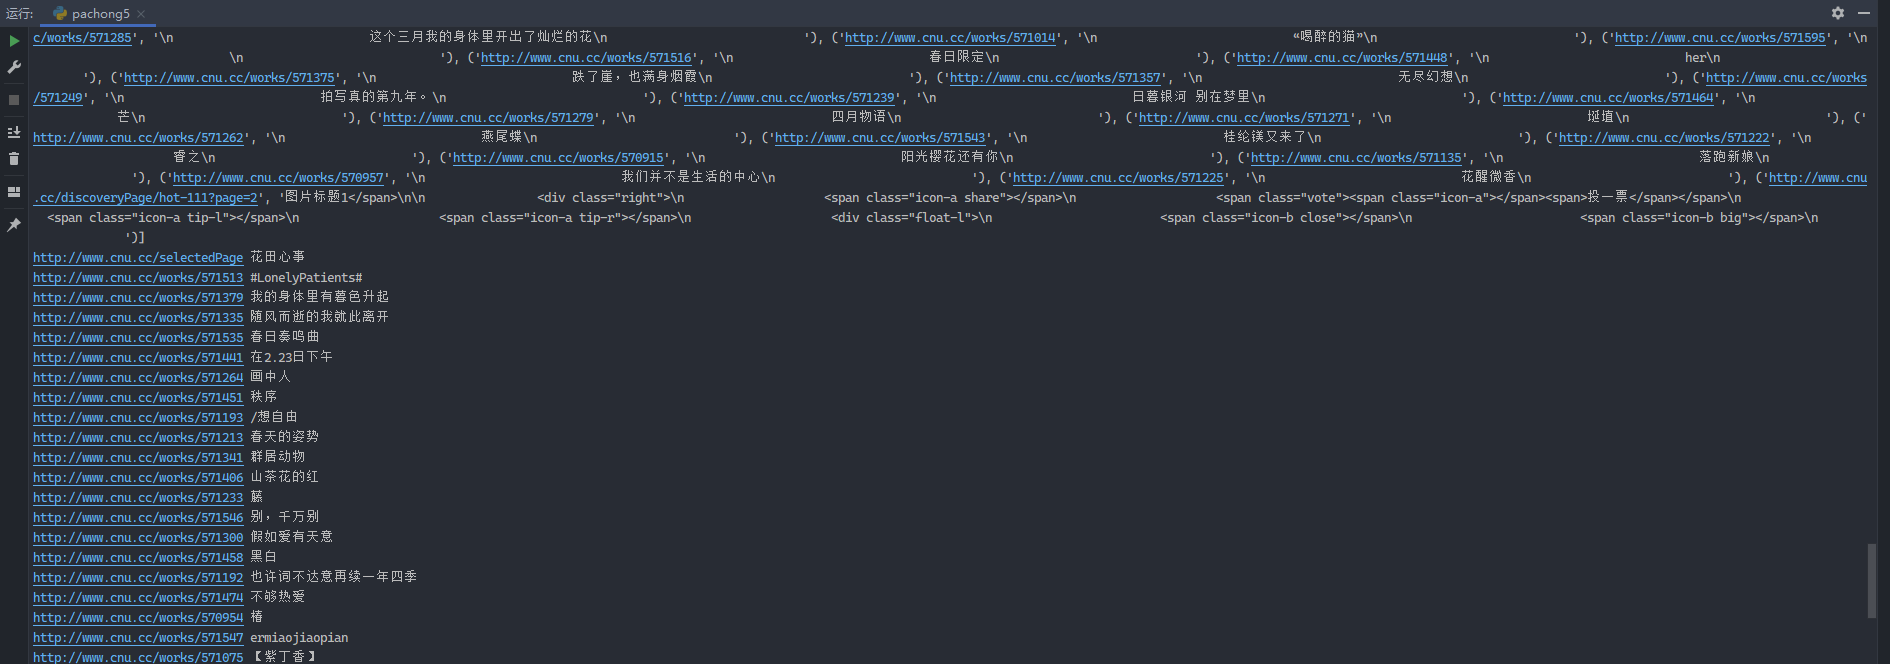
示例7:
1 2 3 4 5 6 7 8 9 10 11 12 13 14 15 16 17 18 import requestsimport recontent = requests.get('http://www.cnu.cc/discoveryPage/hot-111' ).text print (content)pattern = re.compile (r'<a href="(.*?)".*?title">(.*?)</div>' , re.S) results = re.findall(pattern, content) print (results)for result in results: url, name = result print (url, re.sub('\\s' , '' , name))
运行结果:部分运行结果如下
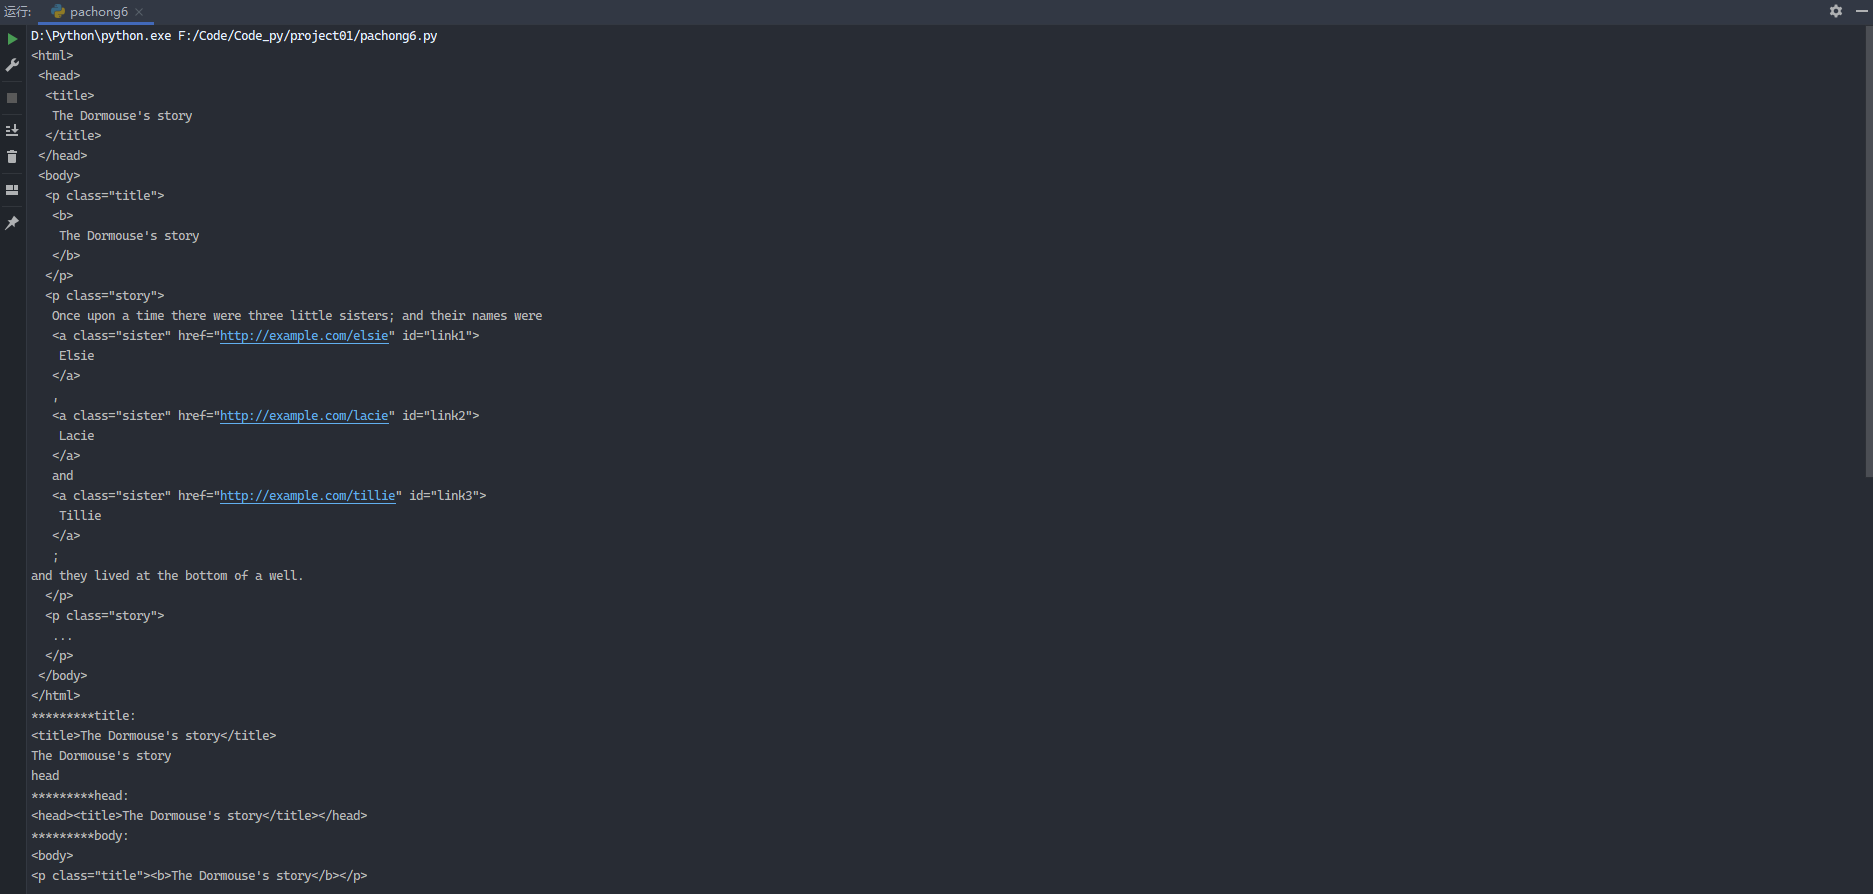
需要在终端中通过pip3 install bs4命令来安装BeautifulSoup库。
示例8:
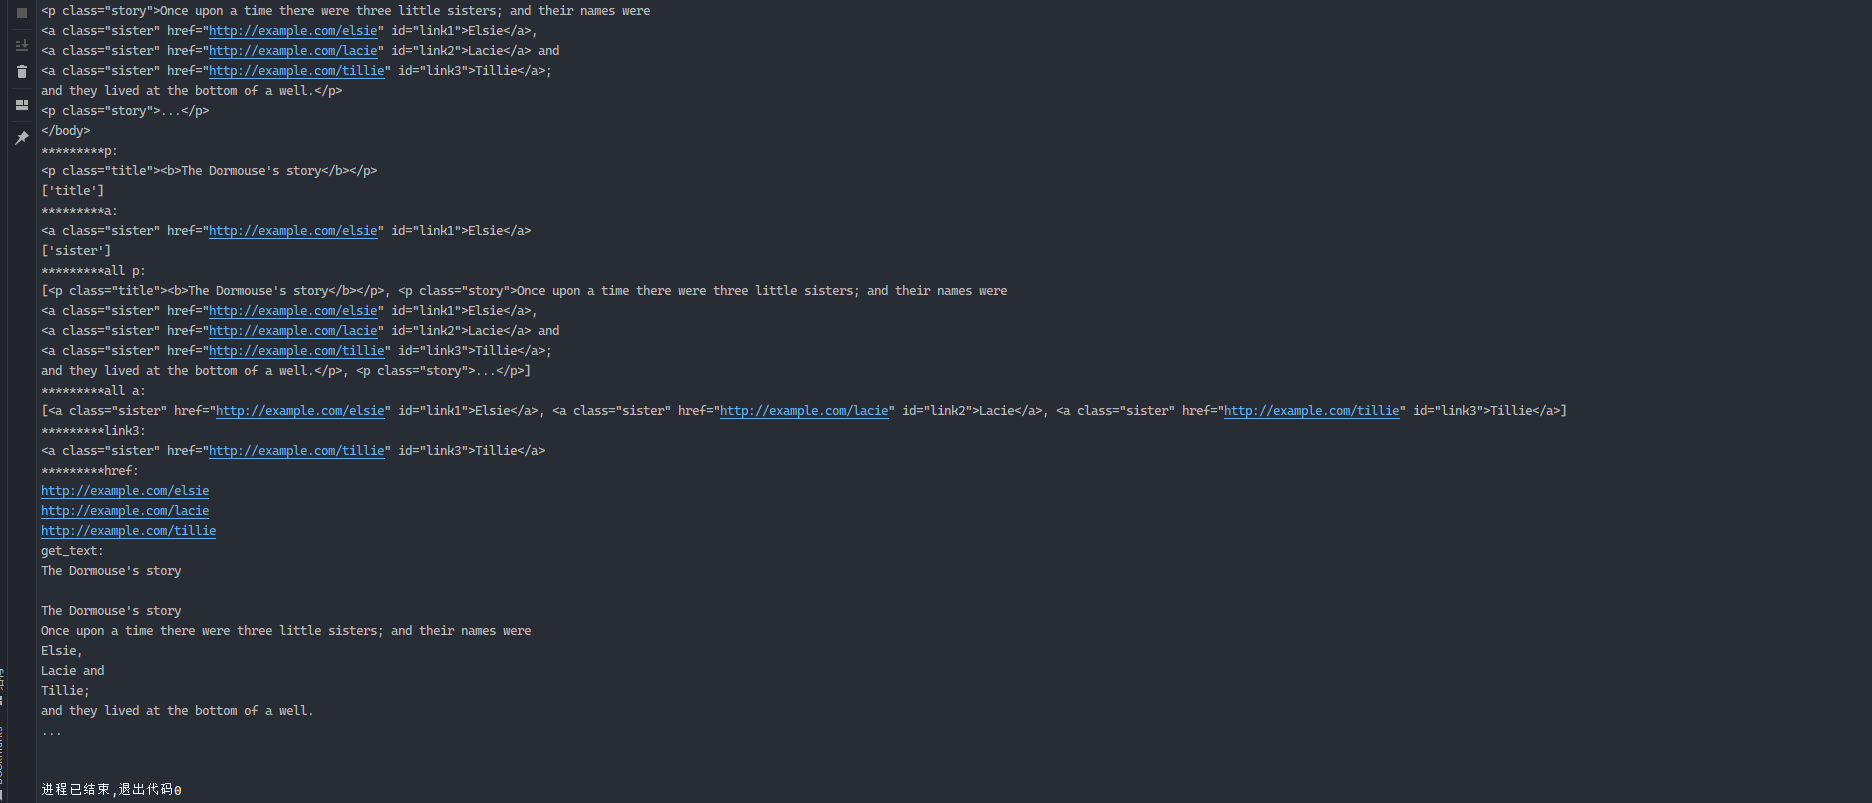
1 2 3 4 5 6 7 8 9 10 11 12 13 14 15 16 17 18 19 20 21 22 23 24 25 26 27 28 29 30 31 32 33 34 35 36 37 38 39 40 41 42 43 44 from bs4 import BeautifulSouphtml_doc = """ <html><head><title>The Dormouse's story</title></head> <body> <p class="title"><b>The Dormouse's story</b></p> <p class="story">Once upon a time there were three little sisters; and their names were <a href="http://example.com/elsie" class="sister" id="link1">Elsie</a>, <a href="http://example.com/lacie" class="sister" id="link2">Lacie</a> and <a href="http://example.com/tillie" class="sister" id="link3">Tillie</a>; and they lived at the bottom of a well.</p> <p class="story">...</p> """ soup = BeautifulSoup(html_doc, 'lxml' ) print (soup.prettify()) print ('*********title:' )print (soup.title)print (soup.title.string)print (soup.title.parent.name)print ('*********head:' )print (soup.head)print ('*********body:' )print (soup.body)print ('*********p:' )print (soup.p) print (soup.p['class' ])print ('*********a:' )print (soup.a) print (soup.a['class' ])print ('*********all p:' )print (soup.find_all('p' ))print ('*********all a:' )print (soup.find_all('a' ))print ('*********link3:' )print (soup.find(id ="link3" ))print ('*********href:' )for link in soup.find_all('a' ): print (link.get('href' )) print ('get_text:' )print (soup.get_text())
运行结果: